12 Wild Edible Plants Recipes That Actually Taste Amazing
Here’s the thing about “wild edible plants” cookbooks: half the recipes taste like you’re punishing yourself for not going to the grocery store. I’ve made those recipes. The bitter dandelion salad with no dressing. The boiled nettles that taste like lawn clippings. The purslane that someone described as “lemony” but actually just tasted like dirt.
These aren’t those recipes.
I’ve been cooking with foraged plants for years, and I’ve learned something that should be obvious but somehow isn’t: wild plants deserve the same respect as any other ingredient. They need fat, acid, salt, heat, and technique — not just “boil and hope for the best.”
The recipes below are the ones I actually make, actually eat, and actually serve to skeptical friends who walk away asking for seconds. Every single one has been tested at least three times. Some have been in my rotation for so long I’ve forgotten which cookbook I originally adapted them from.
Let’s cook some weeds.
Before You Start: Foraging Safety Basics
I’m not going to belabor this, but I have to say it: don’t eat anything you can’t identify with 100% certainty. If you’re new to foraging, pick up at least two field guides specific to your region and go out with someone experienced before you harvest anything for the table.
⚠️ SAFETY DISCLAIMER: The recipes in this article use plants that are widely recognized as edible. However, plant misidentification can cause serious illness or death. Always verify identification using multiple reliable sources. Avoid harvesting from roadsides, sprayed lawns, or contaminated areas. The author and ediblewildplant.com assume no liability for injury or illness resulting from wild plant consumption. When in doubt, don’t eat it.
The plants used in these recipes — dandelion, stinging nettle, chickweed, elderflower, purslane, lamb’s quarters, wild garlic, and burdock — are all beginner-friendly species with distinctive identification features and few dangerous lookalikes. But you still need to learn what each one looks like before you harvest.
Got it? Good. Now let’s cook.
Dandelion (Taraxacum officinale)
Dandelion is the gateway foraged food. You already know what it looks like. You probably have fifty of them in your yard right now. The trick is harvesting the right parts at the right time.
- Leaves: Best in early spring before the flowers appear. Once the plant flowers, the leaves turn aggressively bitter.
- Flowers: Harvest on a sunny day when fully open. Use immediately — they wilt fast.
- Roots: Dig in fall when the plant has stored energy. Roast them for a coffee substitute.
Recipe 1: Dandelion Pesto
This is the recipe that converts dandelion skeptics. The garlic, parmesan, and olive oil tame the bitterness without erasing the flavor completely. You want some bite — that’s what makes it interesting.
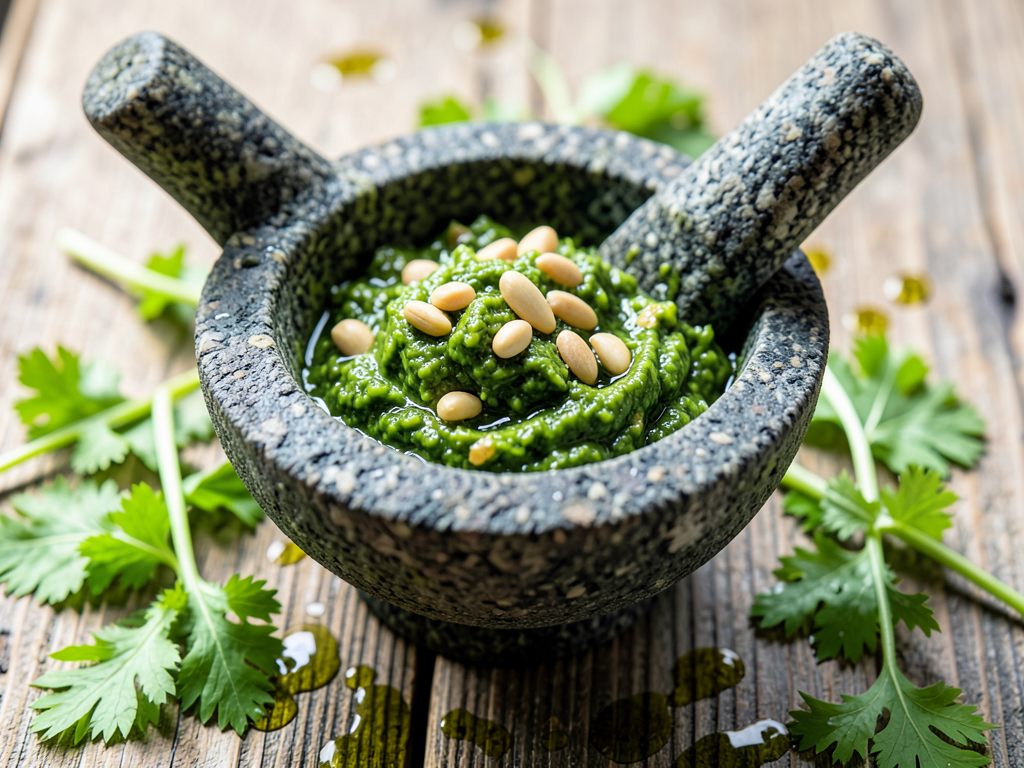
Ingredients:
- 2 cups packed fresh dandelion leaves (young spring leaves, washed and dried)
- 1/2 cup fresh basil leaves (optional — smooths the edge if your dandelions are assertive)
- 1/3 cup pine nuts or walnuts, lightly toasted
- 2–3 cloves garlic, peeled
- 1/2 cup grated parmesan cheese
- 1/2 cup good olive oil
- Juice of half a lemon
- Salt and black pepper to taste
Method:
- Toast the nuts in a dry pan over medium heat until fragrant — about 2 minutes. Don’t walk away. Burnt pine nuts smell terrible and cost $14 a bag.
- Combine dandelion leaves, basil, toasted nuts, and garlic in a food processor. Pulse until roughly chopped.
- With the motor running, stream in the olive oil. Stop when you hit a consistency you like — chunky or smooth, your call.
- Transfer to a bowl. Stir in parmesan and lemon juice. Season with salt and pepper.
- Taste and adjust. Needs more acid? Add lemon. Too bitter? More parmesan. Flat? More salt.
Use it on: Pasta, roasted vegetables, spread on toast with a fried egg on top, stirred into scrambled eggs, or thinned with extra oil as a salad dressing.
Storage: Keeps in the fridge for a week, or freeze in ice cube trays for single-serving pesto cubes.
Recipe 2: Dandelion Flower Fritters
These are dangerously easy to eat. Light, crispy, slightly sweet — they’re basically funnel cake wearing a flower crown.
Ingredients:
- 20–25 fresh dandelion flower heads (fully open, no stems attached — just the yellow tops)
- 3/4 cup all-purpose flour
- 1/4 cup cornstarch (this is the secret to crispiness)
- 1 teaspoon baking powder
- Pinch of salt
- 1 egg
- 3/4 cup cold sparkling water (cold = crispier batter)
- Oil for frying (sunflower or canola)
- Powdered sugar or honey for serving
Method:
- Heat about an inch of oil in a heavy pan to 350°F (175°C). If you don’t have a thermometer, drop a small bit of batter in — it should sizzle and rise immediately.
- Whisk flour, cornstarch, baking powder, and salt in a bowl.
- Add the egg and sparkling water. Whisk until just combined — lumps are fine. Overmixing makes tough fritters.
- Holding each flower by the green base, dip into the batter. Let excess drip off.
- Fry in batches, 2–3 minutes per side, until golden. Don’t crowd the pan.
- Drain on paper towels, dust with powdered sugar, and eat immediately. They don’t hold well — but they also won’t last long enough for that to matter.
Stinging Nettle (Urtica dioica)
If dandelion is the gateway plant, nettle is the one that makes you feel like a real forager. Yes, it stings. Yes, you need gloves to harvest it. And yes, the sting disappears completely the moment it hits hot water or heat.
Nettle tastes like spinach that went to finishing school — greener, more mineral, more interesting. It’s also absurdly nutritious. Pound for pound, dried nettle has more protein than pretty much any other leafy green.
Harvesting tip: Pick only the top 4–6 inches of young plants in spring. Once nettle flowers, it develops gritty crystals called cystoliths that can irritate your kidneys. Young spring nettles only. Wear thick gloves.
Recipe 3: Creamy Stinging Nettle Soup
This is the recipe I make every April when the first nettles push through. It takes 30 minutes from harvest to bowl and it tastes like spring distilled into soup.
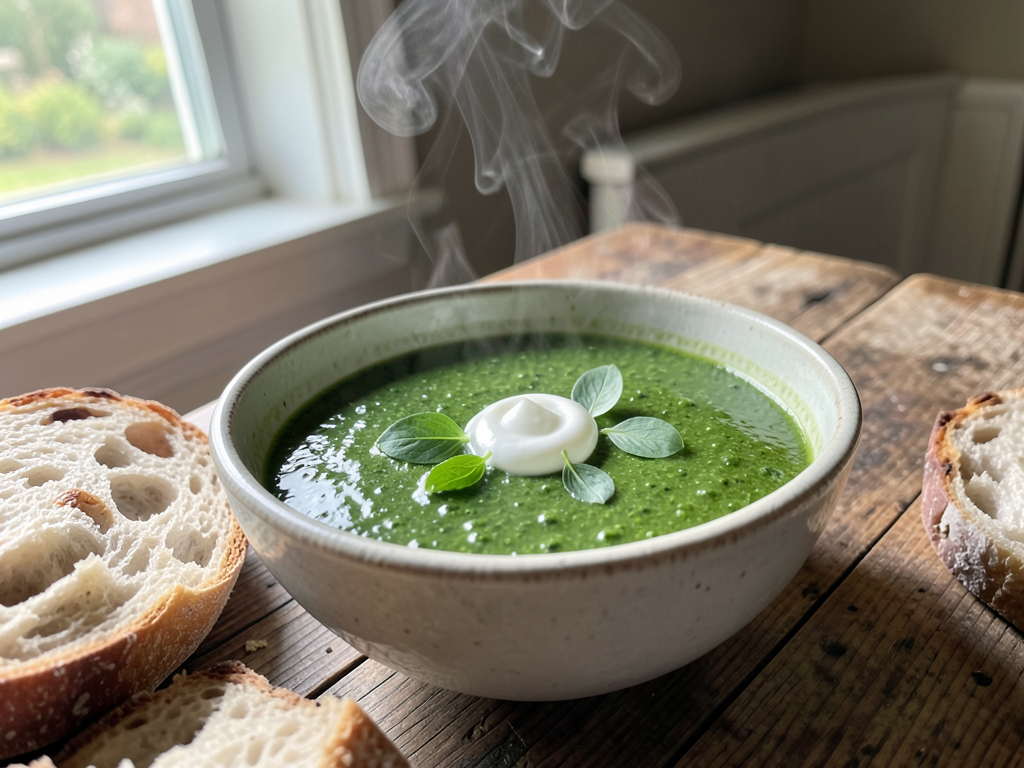
Ingredients:
- 6 cups fresh young nettle tops (packed — use gloves to handle raw nettles)
- 1 large onion, diced
- 2 tablespoons butter or olive oil
- 2 medium potatoes, peeled and diced small
- 4 cups vegetable or chicken stock
- 1/2 cup heavy cream (or coconut milk for dairy-free)
- Salt, white pepper, and freshly grated nutmeg
- A squeeze of lemon juice at the end
Method:
- Fill a large bowl with cold water. Wearing gloves, rinse the nettles thoroughly and remove any thick stems.
- In a large pot over medium heat, melt the butter and sauté the onion with a pinch of salt until soft and translucent — about 8 minutes. Don’t brown it.
- Add diced potatoes and stock. Bring to a boil, then simmer until potatoes are fork-tender, about 12 minutes.
- Add all the nettles at once. They’ll wilt dramatically in about 60 seconds. Stir and simmer for 3–4 minutes — no longer, or you’ll lose the bright green color.
- Remove from heat. Blend until silky smooth using an immersion blender (or carefully in batches in a regular blender).
- Stir in cream, a generous pinch of nutmeg, salt, and white pepper. Add a squeeze of lemon — this brightens everything.
- Ladle into bowls. Optional toppings: a swirl of cream, a few blanched nettle tips, croutons, or a drizzle of chili oil.
Variations: Add a leek instead of onion. Throw in a handful of wild garlic if you have it. Swap potato for cauliflower for a lower-carb version.
Recipe 4: Nettle and Ricotta Stuffed Pasta
If you want to show off at a dinner party, this is the move. Homemade pasta isn’t strictly necessary — you can use large pasta shells — but fresh pasta with foraged nettle filling makes people think you’re a woodland wizard.
Ingredients for filling:
- 3 cups fresh nettle tops, blanched and squeezed dry (about 1 cup after squeezing)
- 1 cup ricotta cheese
- 1/2 cup grated parmesan
- 1 egg yolk
- Zest of 1 lemon
- Salt, pepper, and a scrape of nutmeg
Method:
- Blanch the nettles for 2 minutes in boiling water, drain, and shock in ice water. Squeeze out every drop of water you can — wet filling ruins pasta.
- Finely chop the blanched nettles.
- Combine with ricotta, parmesan, egg yolk, lemon zest, salt, pepper, and nutmeg. Mix thoroughly.
- Use as filling for ravioli, tortellini, or stuffed shells. Serve with browned butter and sage.
Elderflower (Sambucus nigra)
Elderflower season is a tiny window — usually 2–3 weeks in late spring or early summer, depending on where you live. When it’s here, you go all in. The fragrance is intoxicating: floral, honeyed, a little musky. Nothing else smells quite like it.
Harvesting note: Only harvest the flowers. The leaves, bark, and unripe berries are toxic. Also, avoid red-berried elder species (Sambucus racemosa) — some sources consider them questionable.
Recipe 5: Elderflower Fritters
In Italy these are called frittelle di fiori di sambuco. In my kitchen they’re called “the reason I set a calendar reminder for elderflower season.”
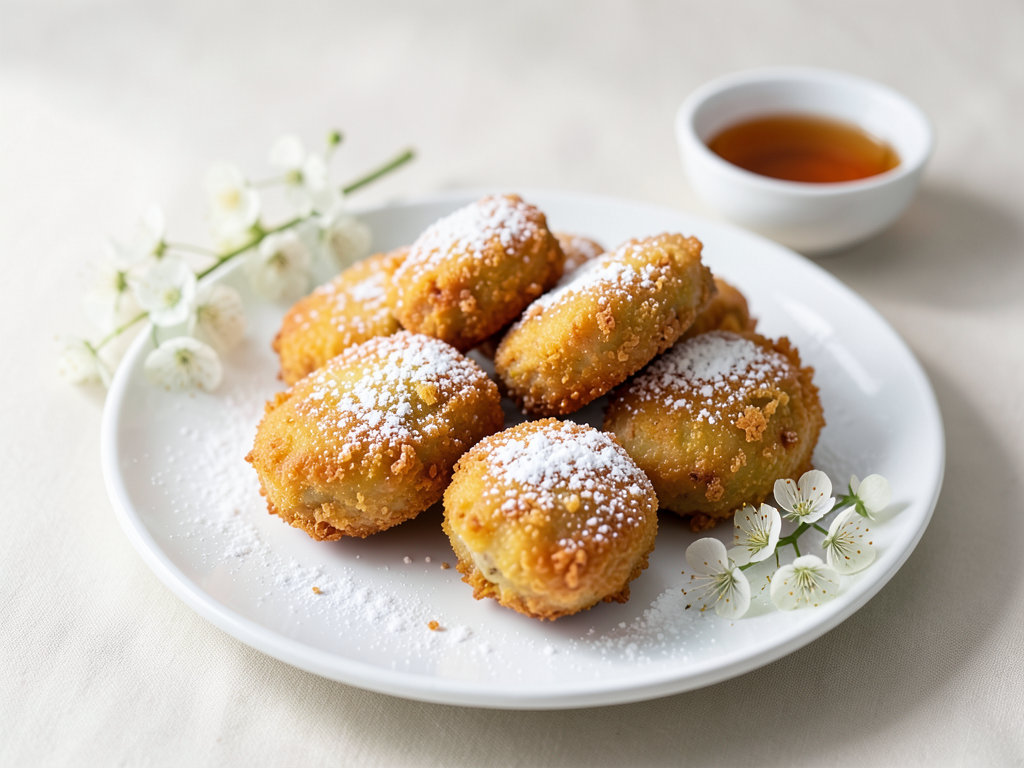
Ingredients:
- 12–15 fresh elderflower heads (fully open, fragrant, cream-colored)
- 1 cup all-purpose flour
- 1 tablespoon sugar
- 1 egg
- 3/4 cup cold milk
- Oil for shallow frying
- Powdered sugar and lemon wedges for serving
Method:
- Gently shake elderflower heads to remove any insects. Do NOT wash — water ruins the pollen, and the pollen is where the flavor lives.
- Whisk flour, sugar, egg, and milk into a smooth batter. It should coat the back of a spoon.
- Heat 1/2 inch of oil in a pan to 350°F.
- Hold each flower head by the stem, dip into the batter, and lay it into the hot oil flower-side down. Fry 2 minutes per side.
- Drain, dust generously with powdered sugar, and serve with lemon wedges. Eat hot.
Recipe 6: Homemade Elderflower Cordial
This isn’t really cooking — it’s more like capturing the smell of June in a bottle. Dilute with sparkling water for a grown-up soda, or add to gin for the best cocktail you’ll make all summer.
Ingredients:
- 20 fresh elderflower heads
- 4 cups sugar
- 4 cups water
- 2 organic lemons (zest and juice)
- 1 tablespoon citric acid (optional — extends shelf life and adds sharpness)
Method:
- Combine sugar and water in a pot. Heat gently until sugar dissolves completely. Do not boil. Cool to room temperature.
- Place elderflower heads in a large bowl with lemon zest, lemon juice, and citric acid.
- Pour the cooled sugar syrup over them. Cover with a clean cloth and leave at room temperature for 24–48 hours. The longer it steeps, the stronger the flavor.
- Strain through a fine mesh sieve lined with cheesecloth. Bottle in sterilized glass bottles.
- Store in the fridge for up to 3 months, or freeze in ice cube trays indefinitely.
Chickweed (Stellaria media)
Chickweed is the wallflower of edible weeds — mild, tender, unassuming. It grows in cool weather and disappears when summer heat hits. If you’ve ever pulled it from your garden beds and thrown it away, you’ve been composting free salad.
It tastes like very mild lettuce with a hint of corn silk. The tiny white flowers look like ten-petaled stars (actually five deeply split petals) — a dead giveaway for identification.
Recipe 7: Chickweed and Cucumber Salad
Simple, crisp, and refreshing. This is what you make when it’s too hot to cook and the chickweed is taking over your raised beds.
Ingredients:
- 3 cups fresh chickweed (tender tips and leaves, washed)
- 1 English cucumber, thinly sliced
- 2 tablespoons rice vinegar
- 1 tablespoon sesame oil
- 1 teaspoon soy sauce
- 1 teaspoon toasted sesame seeds
- Pinch of sugar
Method:
- Toss chickweed and cucumber together in a bowl.
- Whisk rice vinegar, sesame oil, soy sauce, and sugar until sugar dissolves.
- Pour dressing over greens, toss gently, and top with sesame seeds. Serve immediately.
Purslane (Portulaca oleracea)
Purslane is a succulent that grows in sidewalk cracks, garden beds, and anywhere it can get a toehold. It’s also one of the best plant sources of omega-3 fatty acids on the planet. The leaves are thick and juicy, with a slightly sour, lemony taste.
Don’t confuse it with spurge (Euphorbia maculata), a toxic lookalike. Break a stem — purslane exudes clear, watery sap. Spurge oozes white, milky latex. Clear sap = safe. Milky sap = put it down.
Recipe 8: Pickled Purslane Stems
Purslane stems are crunchy and substantial enough to pickle. These are outstanding on tacos, in grain bowls, or straight from the jar.
Ingredients:
- 2 cups purslane stems (thick ones work best), cut into 2-inch pieces
- 1/2 cup apple cider vinegar
- 1/2 cup water
- 1 tablespoon sugar
- 1 teaspoon salt
- 1 clove garlic, smashed
- 1/2 teaspoon coriander seeds
- 1 small dried chili (optional)
Method:
- Pack purslane stems into a clean jar with garlic, coriander, and chili.
- Bring vinegar, water, sugar, and salt to a boil. Stir to dissolve.
- Pour hot brine over purslane. Let cool to room temperature, then refrigerate.
- Ready in 24 hours. Keeps for a month in the fridge.
Lamb’s Quarters (Chenopodium album)
Also called wild spinach, goosefoot, or fat hen. If you’ve ever tasted spinach, you already know what lamb’s quarters tastes like — but better. It’s earthier, nuttier, and doesn’t leave that weird chalky film on your teeth.
The leaves have a distinctive white, powdery coating on the underside. Young leaves are tender enough for salads; older leaves need cooking.
Recipe 9: Lamb’s Quarters Saag
This is my wild-food adaptation of Indian saag paneer. The lamb’s quarters collapse into a silky green sauce that makes you forget spinach ever existed.
Ingredients:
- 8 cups fresh lamb’s quarters leaves (or a mix with chickweed and nettle)
- 1 onion, finely diced
- 3 cloves garlic, minced
- 1-inch piece ginger, grated
- 1 green chili, minced (or to taste)
- 1 teaspoon cumin seeds
- 1 teaspoon garam masala
- 2 tablespoons ghee or oil
- 1/2 cup cream or yogurt
- Salt to taste
- Paneer or tofu cubes, fried until golden (optional)
Method:
- Blanch lamb’s quarters in boiling water for 3 minutes. Drain, shock in ice water, squeeze dry, and roughly chop.
- Heat ghee in a pan. Add cumin seeds — when they pop, add onion and cook until golden.
- Add garlic, ginger, and chili. Cook 2 minutes until fragrant.
- Add the chopped greens, garam masala, and salt. Cook for 5 minutes, stirring.
- Blend with a splash of water until smooth. Return to the pan, stir in cream, and heat through.
- Fold in fried paneer cubes. Serve with rice or naan.
Wild Garlic / Ramps (Allium ursinum / Allium tricoccum)
The smell is the giveaway. Crush a leaf — if it smells like garlic, you’ve got wild garlic. If it doesn’t, you might be holding lily of the valley, which is toxic. This is why the sniff test matters.
Recipe 10: Wild Garlic Butter
This is essentially compound butter with attitude. It freezes beautifully and makes everything taste like you know what you’re doing.
Ingredients:
- 1 cup softened unsalted butter
- 1/2 cup finely chopped wild garlic leaves
- Zest of 1 lemon
- 1/2 teaspoon flaky sea salt
- Black pepper
Method:
- Beat everything together until evenly distributed.
- Roll into a log using parchment paper. Twist the ends to seal.
- Refrigerate or freeze. Slice off rounds to melt over steak, fish, roasted vegetables, pasta, or warm bread.
Burdock (Arctium lappa)
Burdock root is a staple in Japanese cooking (gobo) and has been a food crop for thousands of years. The root is long, tough to dig, and requires serious scrubbing — but the reward is an earthy, nutty flavor unlike anything else in the wild pantry.
Recipe 11: Kinpira Gobo (Braised Burdock Root)
This is the Japanese preparation that turned me into a burdock believer. Cut into matchsticks, braised in soy and mirin, it becomes chewy, savory, and slightly sweet.
Ingredients:
- 2 cups burdock root, scrubbed and cut into thin matchsticks (soak in water with a splash of vinegar to prevent browning)
- 1 carrot, cut into matchsticks
- 1 tablespoon sesame oil
- 1 tablespoon soy sauce
- 1 tablespoon mirin
- 1 teaspoon sugar
- Toasted sesame seeds and shichimi togarashi for serving
Method:
- Drain the soaked burdock. Heat sesame oil in a skillet over medium-high heat.
- Add burdock and carrot. Stir-fry for 3–4 minutes.
- Add soy sauce, mirin, and sugar. Cook, stirring, until the liquid reduces to a glossy glaze — about 5 minutes.
- Serve sprinkled with sesame seeds and togarashi. Good hot, room temperature, or cold from the fridge the next day.
The Wild Weed Frittata (A Clean-Out-the-Fridge Recipe)
Recipe 12: Mixed Wild Greens Frittata
This is my Tuesday-night dinner when I’ve been foraging and the fridge is overflowing with greens that need to be used right now. It works with literally any combination of edible greens — dandelion, chickweed, lamb’s quarters, nettle, purslane, garlic mustard, amaranth.
Ingredients:
- 4 cups mixed wild greens, washed and roughly chopped
- 1 small onion or 2 shallots, diced
- 1 tablespoon butter or olive oil
- 8 eggs
- 1/4 cup milk or cream
- 1/2 cup grated cheese (cheddar, gruyère, or feta)
- Salt, pepper, and a pinch of red pepper flakes
- Any herbs you have lying around
Method:
- Preheat broiler. In a 10-inch oven-safe skillet, sauté onion in butter over medium heat until soft.
- Add wild greens in handfuls, stirring as they wilt. Season with salt and pepper. Cook until all liquid has evaporated — wet greens make a watery frittata.
- Whisk eggs with milk, cheese, and seasonings. Pour over the greens.
- Cook on the stove without stirring until the edges are set, about 5 minutes.
- Transfer to broiler for 2–3 minutes until the top is golden and puffed.
- Let rest 5 minutes before slicing. Serve warm or at room temperature.
Quick Reference: Which Plant for Which Recipe?
| Plant | Best Season | Best For |
|---|---|---|
| Dandelion (leaves) | Early spring | Pesto, salads |
| Dandelion (flowers) | Spring | Fritters, wine |
| Stinging nettle | Spring | Soup, pasta filling |
| Elderflower | Late spring/early summer | Fritters, cordial |
| Chickweed | Spring and fall | Salads, sandwiches |
| Purslane | Summer | Pickles, salads, stir-fries |
| Lamb’s quarters | Spring through fall | Saag, anywhere you’d use spinach |
| Wild garlic | Spring | Compound butter, pesto |
| Burdock root | Fall | Braised, stir-fried |
Equipment That Actually Helps
You don’t need much. But a few things make the difference between “this is annoying” and “I could do this every week.”
- A good basket: Something with structure, not a floppy bag, so your greens don’t get crushed. A traditional woven foraging basket is great, but a canvas tote with a flat bottom works fine.
- Thick gardening gloves: For nettles. The longer the cuff, the better.
- A salad spinner: Wild greens are dirty. A spinner is faster and more effective than patting things dry with paper towels, and it’s not single-use.
- Immersion blender: For silky soups without transferring hot liquid to a blender. Fewer dishes, fewer burns.
- A cheap digital kitchen scale: Many wild plant recipes work better by weight than volume since plant density varies wildly.
Common Mistakes Beginners Make
Harvesting too late in the season. Most wild greens are at their peak before flowering. Once flowers appear, energy shifts toward reproduction and leaves turn bitter or tough. Learn the life cycle of each plant you want to cook with.
Overcooking wild greens. Many wild greens are more delicate than cultivated varieties. Nettle needs 3 minutes in soup, not 30. Treat them like fresh spinach, not like kale.
Skipping the blanch. For bitter greens like mature dandelion or field mustard, a quick 30-second blanch in boiling water — followed by an ice bath — removes bitterness without cooking them to death. Then sauté or add to recipes as needed.
Not tasting as you go. Recipes are roadmaps, not dictators. Taste at every step. Wild plants vary enormously in bitterness, tenderness, and intensity depending on season, location, and weather. Adjust accordingly.
Using too little fat and salt. This is the number one reason people think wild food tastes bad. Wild greens are lean. They need butter, olive oil, bacon fat, cheese — whatever you have. Salt generously. A bland foraged meal is a choice, not an inevitability.
Frequently Asked Questions
Can I freeze wild greens?
Absolutely. Blanch them for 1–2 minutes, shock in ice water, squeeze dry, and freeze in portioned bags. Nettle, lamb’s quarters, and dandelion greens all freeze well this way. They won’t work for salads after freezing, but they’re perfect for soups, sautés, and pesto.
Are these recipes gluten-free?
Most are naturally gluten-free or easily adaptable. The dandelion and elderflower fritters are the main exceptions — swap all-purpose flour for a gluten-free blend and they still work.
What if I can’t find one of these plants?
Substitute freely. These recipes are templates. No lambs quarters? Use spinach. No purslane? Use watercress. The techniques matter more than the specific plants.
Are wild plants more nutritious than cultivated ones?
Generally, yes. Wild plants grow in unfertilized soil and develop deeper root systems, which means they pull up more minerals. Studies consistently show wild greens have higher levels of vitamins A, C, and K, plus more calcium, iron, and magnesium than their cultivated counterparts. Nettle in particular is a nutritional powerhouse.
How do I avoid harvesting from contaminated areas?
Avoid roadsides (heavy metal accumulation from exhaust), conventional farm edges (pesticide drift), dog-walking routes, and industrial sites. Head to conservation areas, state parks where foraging is permitted, your own untreated backyard, or private land with permission. A good rule of thumb: if you wouldn’t drink water from a puddle there, don’t harvest food there either.
A Final Note on the Joy of Eating Wild
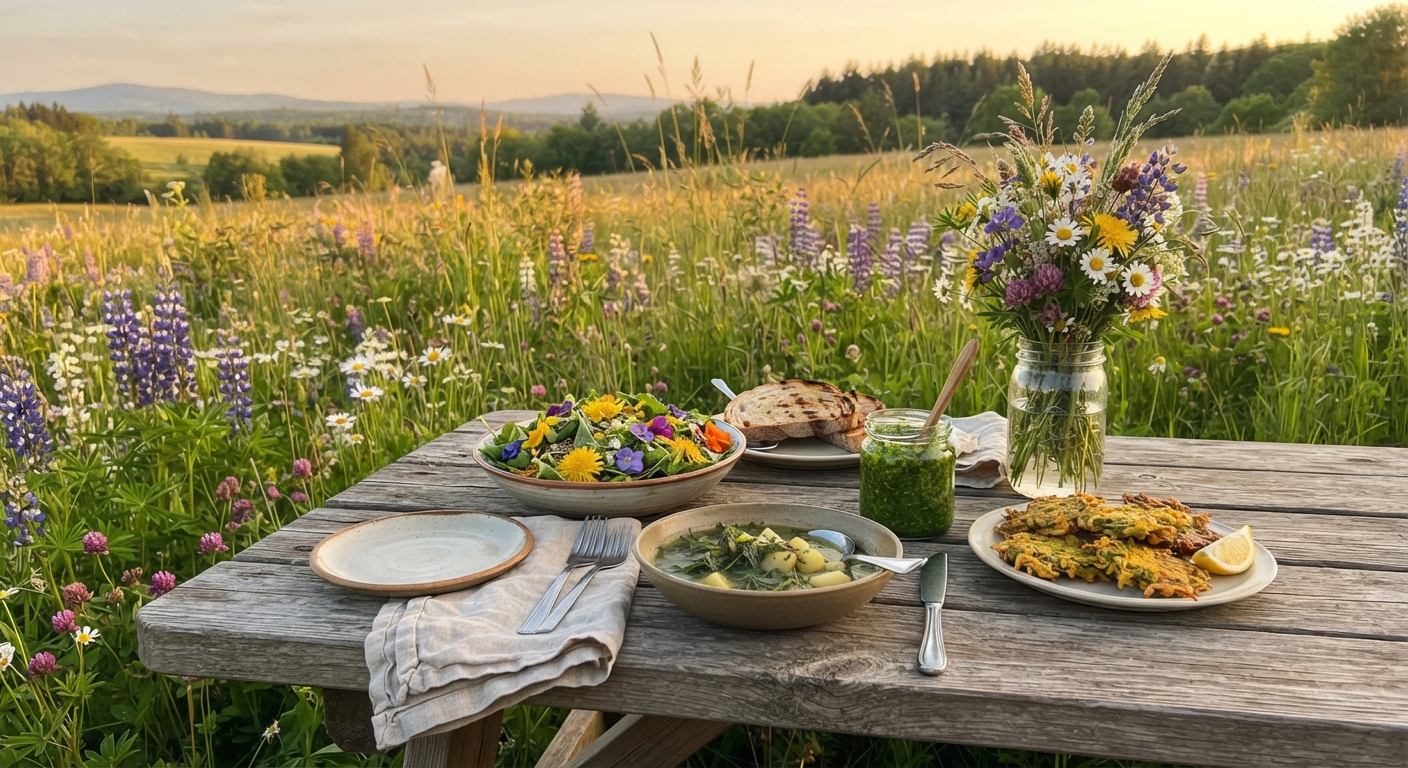
Cooking with wild food changes your relationship with the outdoors. You start noticing plants everywhere — on walks, in parking lots, at the edges of soccer fields. You develop a calendar in your head: April is nettle month, June is elderflower, July is purslane. You become one of those people who stops mid-conversation to point at a plant because “you can eat that.”
My favorite thing about these recipes isn’t that they’re free or that they’re nutritious. It’s that they tell a story. Every plate of nettle soup remembers the cold April morning you pulled on gloves and filled your basket. Every jar of elderflower cordial tastes like that one perfect week in June when the whole hedgerow smelled like honey.
Foraging isn’t just about the food. But the food is a pretty great bonus.
Now go fill a basket with something green.
Happy foraging — and happy cooking. If you try any of these recipes, tag us with your results. We love seeing what you make from the wild.