The first time I tried to make acorn flour, I almost gave up and threw the whole batch into the woods.
I’d read somewhere that you could eat acorns. “Oaks are everywhere,” I thought. “How hard can this be?” I collected a canvas bag full of big, fat acorns from a white oak near my house, shelled them with a hammer (messy), ground them in a blender (louder than I expected), and mixed the resulting “flour” into pancake batter.
The pancakes looked gorgeous. Golden-brown, almost nutty-looking. I took a bite.
My mouth puckered. My throat tightened. It tasted like I’d licked a rusty fence post while sucking on an aspirin.
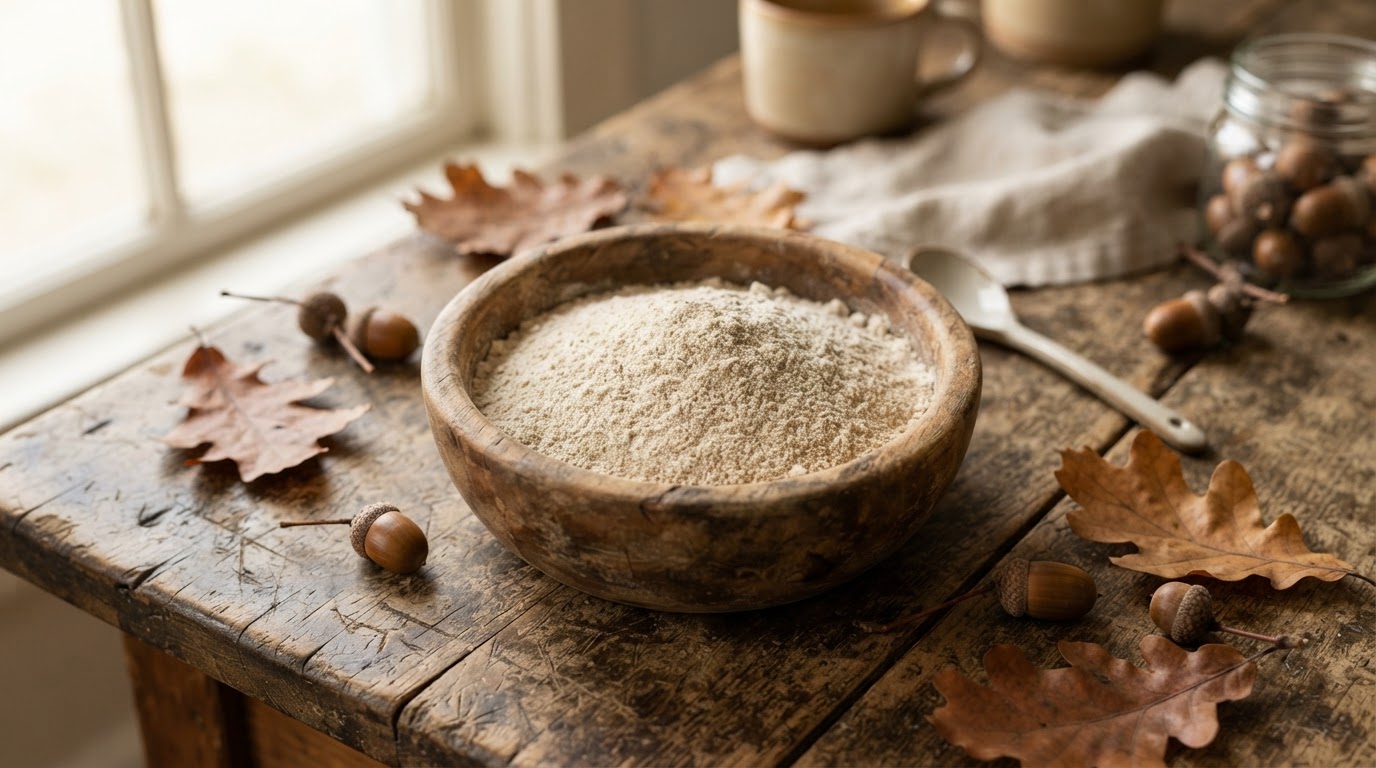
That’s the tannins, I learned later. Acorns are packed with bitter, astringent compounds that make them inedible raw. But once you remove those tannins through a process called leaching, what’s left is one of the most underrated wild flours on the planet — nutty, slightly sweet, gluten-free, and loaded with protein, healthy fats, and minerals.
This guide walks you through every step of making acorn flour the right way. I’ve made every mistake so you don’t have to.
Why Bother With Acorn Flour?
Before we get our hands dirty, let’s talk about why anyone would spend hours processing nuts that most people ignore.
Acorns have been a staple food for thousands of years. Indigenous peoples across North America, Korea, Japan, and the Mediterranean relied on acorn flour long before wheat existed. Korean dotorimuk (acorn jelly) is still a beloved dish. In parts of Italy, acorn flour was used in pasta and bread during hard times.
Nutritionally, acorn flour holds its own:
| Nutrient | Acorn Flour (per 100g) | White Wheat Flour (per 100g) |
|---|---|---|
| Calories | ~380 | ~364 |
| Protein | 6–8g | 10g |
| Healthy Fats | 16–24g | 1g |
| Fiber | 5–7g | 2.7g |
| Calcium | ~40mg | 15mg |
| Potassium | ~540mg | 107mg |
| Iron | ~1mg | 1.2mg |
| Gluten | None | Present |
What stands out is the fat content. Acorn flour is rich in monounsaturated fats — the same heart-healthy fats found in olive oil and avocados. That fat content also means acorn flour behaves differently in baking. It adds moisture and richness that white flour can’t match, which is why acorn brownies and pancakes often come out better than the wheat versions.
And then there’s the fact that oak trees drop literal tons of free food every autumn. If you live anywhere with oak trees, you’re walking past a pantry every time you step outside.
Identifying the Right Oak Trees
Not all acorns are created equal. The bitterness varies dramatically between oak species, and picking the right tree makes everything easier.
White Oaks (Quercus alba and relatives)
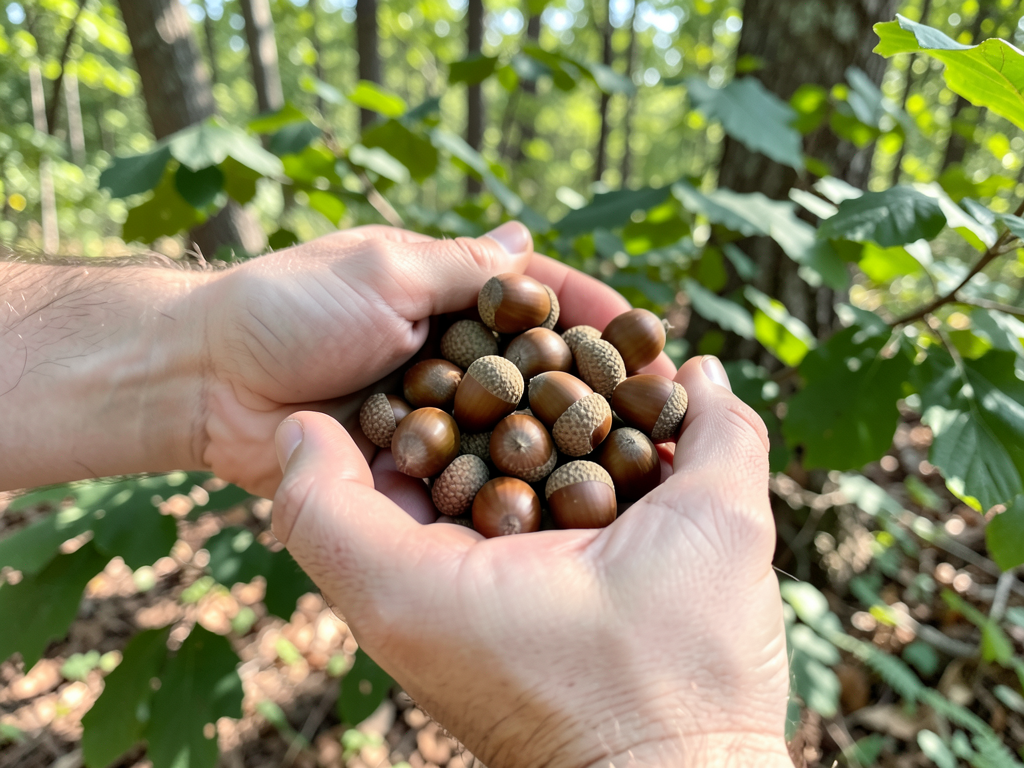
White oaks produce acorns with rounded leaf lobes and acorns that mature in a single season. Their acorns are generally lower in tannins — sometimes sweet enough to eat raw in small quantities. If you’re new to acorn processing, start here.
Look for: rounded leaf lobes, light gray bark with shaggy texture, acorn caps that detach easily.
Red Oaks (Quercus rubra and relatives)
Red oaks have pointed leaf lobes with bristle tips, and their acorns take two seasons to mature. They’re significantly higher in tannins and require more leaching, but the resulting flour has a richer, more robust flavor that many foragers actually prefer.
Look for: pointed leaf lobes with tiny bristles, dark furrowed bark, acorn caps that grip tightly.
Live Oaks and Others
If you’re in the southern US or California, you’ll encounter live oaks, valley oaks, and coastal species. The rule of thumb remains: fatter, rounder acorns from white oak family trees will be milder. Test a small piece — if it’s intensely bitter, you’ve got a high-tannin variety that needs thorough leaching.
One Critical Safety Note
Don’t collect acorns that have small holes in the shell. Those are weevil exit holes — meaning a grub has already eaten the nut meat from the inside. Float-test your acorns in a bucket of water. Discard any that float (they’re hollow or rotten). Keep the sinkers.
When and How to Harvest Acorns
Timing matters. Acorns start dropping in late summer and continue through fall, with the peak usually in September and October depending on your latitude.
Go right after a windy day or a rainstorm — the ground will be covered with fresh drops. Collect acorns that are still firm and have their caps attached (or recently detached). Avoid acorns that look moldy, have cracks, or show discoloration. The nut inside should be cream-colored or pale yellow, never dark or shriveled.
A single mature oak can drop 2,000 to 10,000 acorns in a mast year. You don’t need a fraction of that. A standard grocery bag full will yield roughly 2 to 3 cups of finished flour — enough for a couple of baking projects.
What you’ll need for harvesting:
- A canvas or mesh bag (something breathable — plastic traps moisture and promotes mold)
- Gardening gloves if the ground is messy
- A small tarp spread under the tree works wonders — shake a branch and collect the fresh drops
Shelling Acorns: The Tedious Part
There’s no sugar-coating this. Shelling acorns takes time. But you develop a rhythm.
Method 1: The Hammer (Quick but Messy)
Lay an acorn on its side on a sturdy surface — a concrete floor, a thick cutting board, or a flat rock. Give it a sharp tap with a hammer. Not a full swing, just a controlled crack. The shell should split open, and you can pry the nut meat out. Wear eye protection — acorn shells can fly.
This method is fast but yields broken pieces and the occasional pulverized nut.
Method 2: The Nutcracker (Cleaner)
A heavy-duty nutcracker — the kind used for black walnuts — works beautifully on acorns. Position the acorn on its side between the grips and squeeze. The shell splits cleanly around the equator. This is my preferred method; it keeps the nut meat intact and is less likely to send shrapnel across the kitchen.
Method 3: Boil-and-Crack (for Large Batches)
Bring a pot of water to a boil. Drop in your acorns for 60–90 seconds. Drain and cool them enough to handle. The brief boil softens the shells just enough that they crack more easily. Some people score a line around the acorn with a knife before boiling, but I’ve found this optional.
Once shelled, inspect each nut for dark spots or weevil damage. A few bad nuts won’t ruin the batch, but you want to remove them. The nuts at this stage are cream to light brown and should feel firm, not rubbery.
Leaching: The Step That Makes Acorns Edible
This is where the magic happens — and where most beginners give up. Don’t be that person.
Acorns contain tannic acid and other polyphenols that bind to proteins, interfere with digestion, and taste aggressively bitter. Leaching removes these compounds by soaking the ground acorn meal in water repeatedly until the bitterness is gone.
Cold Water Leaching (Recommended)
Cold water leaching preserves the starches and natural oils in the acorn meal, resulting in flour that binds together well for baking. It takes longer but produces superior flour.
Here’s the process:
-
Grind the shelled acorns first. Pulse them in a food processor or blender with just enough water to create a coarse slurry — think coarse polenta or wet sand consistency. Don’t over-grind into paste yet.
-
Transfer to a large jar or bowl. A half-gallon mason jar works perfectly. Fill it no more than halfway with the acorn meal, then top off with cold water.
-
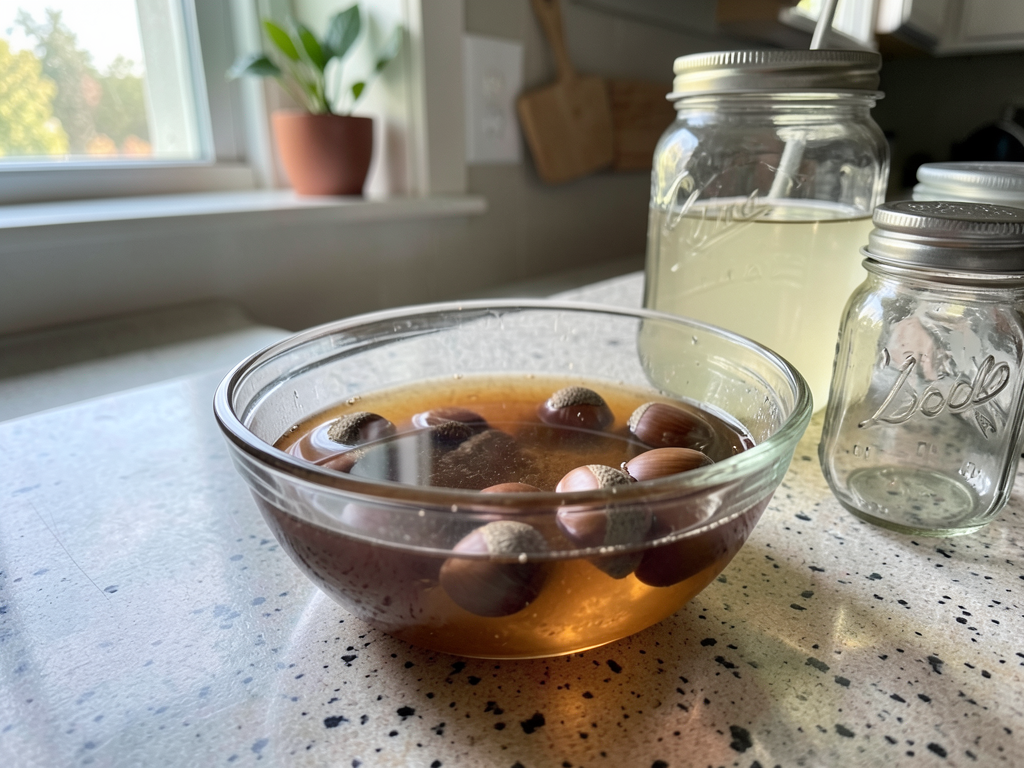
Shake or stir and let it sit. Put the jar in the refrigerator (cooler temperatures prevent fermentation). Let it sit for 12–24 hours.
-
Pour off the dark water. You’ll see the water turn brown — that’s the tannins leaving. Pour it off carefully, leaving the settled meal at the bottom. Refill with fresh cold water.
-
Repeat. How many times? Until the water runs clear and a taste test on a tiny pinch of the meal has no bitterness. For white oak acorns, this might take 3–5 water changes. For red oak acorns, it could take 6–10 changes over several days.
-
Final taste test. Squeeze a bit of the wet meal and taste it. It should taste mild and slightly nutty — like almonds, not like regret.
Hot Water Leaching (Faster but Different)
Hot water leaching speeds things up considerably. Bring a pot of water to a boil, add your ground acorn meal, and boil for 15–20 minutes. Pour off the brown water through a cheesecloth-lined strainer, add fresh boiling water, and repeat. You might only need 3–5 changes.
The trade-off: hot water gelatinizes some of the starches. The resulting flour won’t bind as well in baking — it’s better suited for porridge, soups, or as a partial wheat flour substitute where gluten provides the structure.
Cold vs. Hot Leaching: Which to Choose?
| Method | Time | Flour Quality | Best For |
|---|---|---|---|
| Cold Water | 2–7 days | Excellent — retains starches | Bread, pancakes, cookies, brownies |
| Hot Water | 2–4 hours | Good — starches partially cooked | Porridge, soups, stews, partial flour substitute |
I use cold water leaching 90% of the time. Yes, it takes days, but it’s almost entirely passive. You’re just pouring off water and refilling once or twice a day. The flour that results is worth the wait.
Drying and Grinding Into Flour
Once the acorn meal tastes clean and mild, it’s time to turn it into shelf-stable flour.
Step 1: Drain Thoroughly
Pour the leached meal through a fine mesh strainer or cheesecloth. Press gently with a spoon to squeeze out excess water. You want it damp, not dripping.
Step 2: Dry the Meal
Spread the wet meal in a thin, even layer on baking sheets or dehydrator trays. You have three options:
- Dehydrator (best): 115–125°F (46–52°C) for 8–12 hours, until completely dry and crumbly
- Oven (fastest): Lowest setting — ideally 150°F (65°C) or below — with the door cracked slightly. Stir every 30 minutes. Takes about 2–4 hours
- Air drying (slowest): Spread on trays in a warm, well-ventilated spot. Takes 1–3 days depending on humidity. Cover with cheesecloth to keep dust and insects out
The meal is fully dry when it crumbles easily between your fingers and no moisture remains. Any residual moisture will cause your stored flour to mold.
Step 3: Grind to Powder
Transfer the dried meal to a high-speed blender, food processor, or dedicated grain mill. Pulse and grind until it reaches a fine, flour-like consistency — similar to almond flour. Sift through a fine mesh strainer and re-grind any larger pieces.
You can store the flour as-is, or sift it through progressively finer screens if you want a bakery-grade consistency. I usually don’t bother — the slightly rustic texture adds character to breads and pancakes.
Storage: How Long Does Acorn Flour Last?
Fresh acorn flour has a shorter shelf life than wheat flour because of its higher fat content. Those healthy oils that make it nutritious also make it prone to rancidity.
- Room temperature (airtight jar, dark cabinet): 1–2 months
- Refrigerator (airtight jar): 4–6 months
- Freezer (vacuum-sealed bag): 12+ months
I keep a small jar in the fridge for weekly use and freeze the rest. Defrosted acorn flour works exactly the same as fresh — no change in texture or flavor.
A quick smell test will tell you if it’s gone rancid. Fresh acorn flour smells nutty and sweet. Rancid flour smells like old crayons or paint. When in doubt, toss it and make a fresh batch.
Three Tested Acorn Flour Recipes
You’ve done the work. Now let’s cook.
1. Acorn Flour Pancakes
These are what got me hooked. The acorn flour adds a nutty depth that regular pancakes wish they had.
Ingredients:
- ¾ cup acorn flour
- ½ cup all-purpose or whole wheat flour
- 1 tablespoon sugar or maple syrup
- 1½ teaspoons baking powder
- ¼ teaspoon salt
- 1 egg
- ¾ cup milk (or plant-based alternative)
- 2 tablespoons melted butter or oil
- ½ teaspoon vanilla extract
Method: Whisk dry ingredients together. In a separate bowl, beat the egg, then mix in milk, melted butter, and vanilla. Combine wet and dry — don’t overmix, a few lumps are fine. Cook on a buttered griddle over medium heat until bubbles form on the surface, flip, and cook another 1–2 minutes. Serve with maple syrup and toasted pecans.
2. Acorn Flour Brownies
Acorn flour does something special to brownies. The natural fats in the flour make them incredibly fudgy.
Ingredients:
- ½ cup acorn flour
- ½ cup all-purpose flour
- ½ cup unsalted butter
- 1 cup dark chocolate chips (divided)
- ¾ cup brown sugar
- 2 eggs
- 1 teaspoon vanilla
- ¼ teaspoon salt
Method: Melt butter and half the chocolate chips together. Stir in brown sugar, then eggs one at a time, then vanilla. Fold in both flours, salt, and remaining chocolate chips. Pour into a greased 8×8 pan. Bake at 350°F (175°C) for 22–25 minutes — the top should be set but still slightly soft in the center. Let them cool completely before slicing. They’re even better the next day.
3. Acorn Flour Crackers
The simplest recipe on the list, and maybe my favorite. These crackers let the acorn flavor shine.
Ingredients:
- 1 cup acorn flour
- ¼ cup all-purpose flour
- 2 tablespoons olive oil
- 3–4 tablespoons cold water
- ½ teaspoon salt
- Optional: rosemary, thyme, sesame seeds, or black pepper
Method: Mix everything into a dough. Roll it paper-thin between two sheets of parchment paper. Score into squares with a knife or pizza cutter. Bake at 325°F (160°C) for 12–15 minutes until edges are golden. Let cool — they’ll crisp up as they cool. Serve with cheese, hummus, or just eat them straight off the tray.
Common Mistakes (I’ve Made Them All)
Using acorns without leaching. You’ll know within seconds. The bitterness is unforgettable — and not in a good way.
Not grinding before leaching. Whole acorn meats take forever to leach. Grind them into a coarse meal first — surface area is your friend.
Impatience during leaching. A slightly bitter taste in the wet meal becomes much more noticeable in the final flour. When in doubt, do one more water change.
Overheating during drying. If your oven goes above 170°F, you risk cooking the flour instead of drying it. Use the lowest possible setting and leave the door cracked.
Storing flour that’s not completely dry. If your flour clumps or smells musty within a week, there was residual moisture. Always err on the side of over-drying.
Using low-quality acorns. Weevil-damaged, moldy, or shriveled acorns produce low-quality flour with off flavors. Be picky during harvest.
Acorn Flour vs. Other Alternative Flours
How does acorn flour stack up against the other gluten-free flours you might already use?
| Flour Type | Flavor Profile | Fat Content | Best Uses | Price (per lb) |
|---|---|---|---|---|
| Acorn Flour | Nutty, earthy, slightly sweet | High | Brownies, pancakes, crackers | Free (forage it) |
| Almond Flour | Mild, buttery | High | Cookies, cakes, breading | $8–12 |
| Coconut Flour | Sweet, coconut | Medium | Cakes, muffins | $5–8 |
| Buckwheat Flour | Earthy, strong | Low | Pancakes, soba noodles | $4–6 |
| Cassava Flour | Neutral | Low | Tortillas, general baking | $5–7 |
The big advantage: acorn flour is free if you’re willing to put in the work. The flavor is unique enough that you can’t just swap it 1:1 in every recipe, but in the right applications — especially chocolate-based desserts and hearty breads — it outperforms the store-bought alternatives.
Sustainability and Foraging Ethics
Oaks are keystone species. A single mature oak supports hundreds of insect species and feeds squirrels, deer, jays, turkeys, and bears. When you harvest acorns, you’re competing with the local wildlife, so do it responsibly.
- Take no more than 10–20% of what’s on the ground from any one tree
- Spread your harvest across multiple trees rather than cleaning out a single productive spot
- Leave the smallest and largest acorns — mid-sized ones are easiest to process anyway
- Never strip acorns directly from the tree — only collect fallen nuts
- Avoid harvesting from trees treated with pesticides or near busy roads where runoff could contaminate the nuts
Foraging ethics isn’t about being perfect. It’s about being a good neighbor to the ecosystem you’re borrowing from. Take what you need, leave plenty for everyone else, and the trees will keep giving for decades.
Frequently Asked Questions
Can I eat acorns raw?
No. Raw acorns contain high levels of tannins that make them bitter, astringent, and potentially harmful in large quantities. Always leach acorns before eating.
How do I know when the acorns are fully leached?
Taste a small pinch of the wet meal. It should be mild and nutty with zero bitterness. If there’s any astringent aftertaste whatsoever, keep leaching.
Can I use acorn flour as a 1:1 replacement for wheat flour?
Not quite. Acorn flour contains no gluten, so it doesn’t provide the same structure. Use it at 25–50% replacement in recipes that call for wheat flour, combined with all-purpose flour or a gluten substitute.
What does acorn flour taste like?
Good acorn flour tastes nutty with earthy undertones and a hint of natural sweetness — think somewhere between chestnut flour and almond flour. Poorly leached flour tastes bitter and unpleasant.
Do different oak species produce different flavors?
Yes. White oak acorn flour tends to be milder and sweeter. Red oak acorn flour is richer and more complex. Some foragers blend the two for depth of flavor.
How long does the whole process take?
Harvesting: 30–60 minutes. Shelling: 1–2 hours depending on volume. Leaching: 2–7 days (passive). Drying: 2–12 hours. Grinding: 15 minutes. Most of that time is hands-off.
Can I freeze acorn flour?
Absolutely. Vacuum-sealed acorn flour in the freezer lasts a year or more without quality loss.
Are there any acorns you should NOT eat?
Avoid acorns from unknown ornamental oaks that might have been treated with pesticides. Also avoid acorns that show signs of mold, insect damage, or rot. When in doubt, the float test and a visual inspection will catch most problems.
The Reward
Making acorn flour is not the fastest route to pancakes. You can buy almond flour on Amazon and have it at your door tomorrow morning.
But there’s something about acorn flour that store-bought alternatives can’t replicate. It’s the knowledge that you picked those nuts from a tree near your home, shelled them with your own hands, leached them over days in your kitchen, and turned them into something genuinely delicious. It’s a connection to the way people ate for millennia — before supermarkets, before industrial agriculture, before we forgot that food grows all around us.
Plus, when you serve acorn flour brownies and casually mention you made the flour from a tree in the park, people’s reactions are worth the effort alone.
The oaks will drop their acorns this fall whether you’re paying attention or not. Might as well grab a bag and see what you can make.