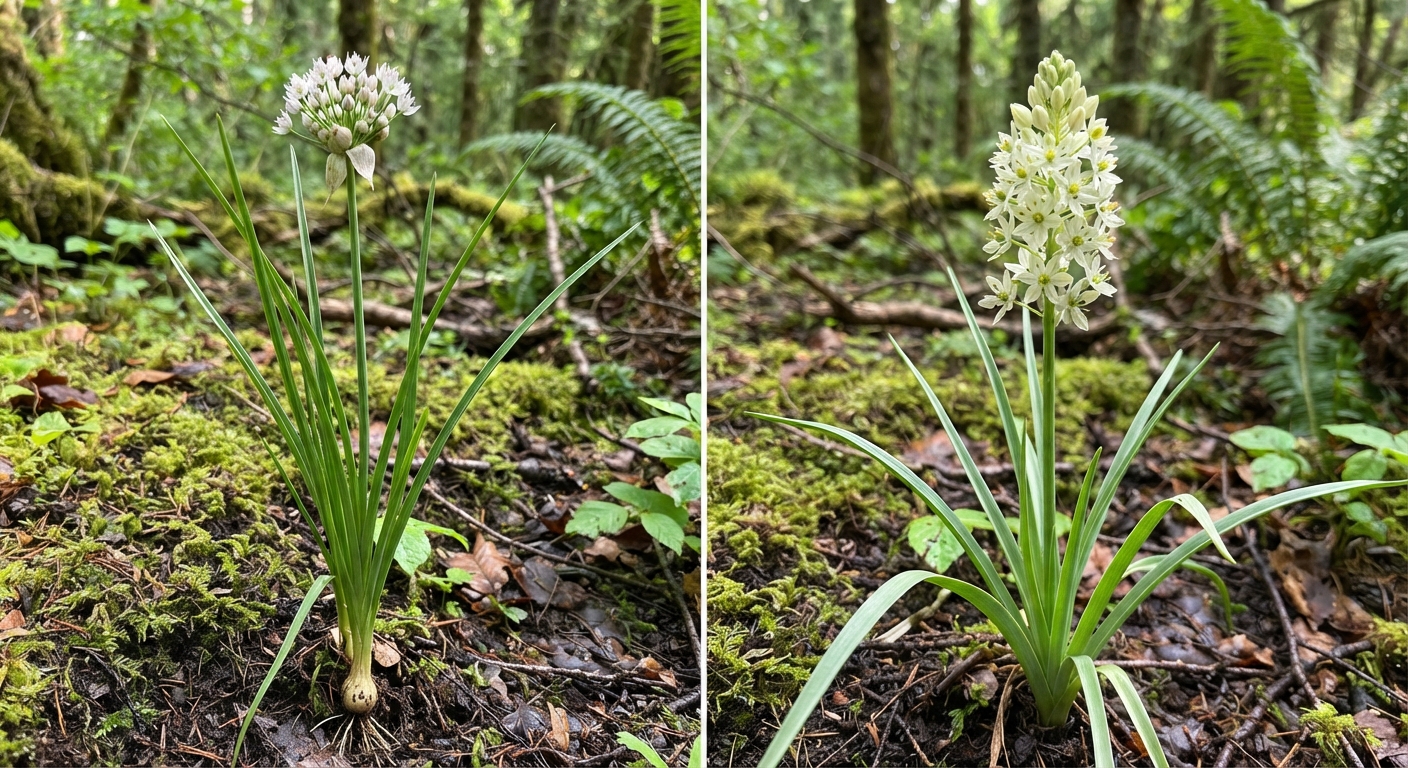
Here’s a scenario that plays out in survival situations more often than anyone wants to admit: you’re surrounded by plants, any number of which might be edible, and you have no field guide, no phone signal, and no margin for error. The question isn’t academic. It’s whether the green thing in front of you is dinner or a trip to the emergency room — or worse, when there is no emergency room to get to.
The Universal Edibility Test (UET) was developed by the U.S. military and refined through decades of survival training precisely for this scenario. It’s not fast. It’s not convenient. It takes a full day to test a single plant part. But when you have no other way to determine whether something is safe to eat, it’s the most reliable method short of a laboratory analysis.
This guide walks through every step of the UET, compares it with other plant safety methods, and — just as importantly — tells you when you should absolutely not use it.
What the Universal Edibility Test Actually Is (and What It Isn’t)
The UET is a systematic, time-staged protocol that exposes your body to an unknown plant in increasing doses — skin contact first, then lips, then mouth, then ingestion — with observation periods between each stage. The logic is straightforward: if the plant is going to cause a reaction, you want to discover that with the smallest possible exposure, on the least vulnerable part of your body, before it ever reaches your digestive system.
What the UET is:
- A last-resort survival method for when identification isn’t possible
- A systematic way to detect contact poisons, oral irritants, and digestive toxins
- A protocol designed to minimize risk during an inherently risky activity
What the UET is not:
- A substitute for proper plant identification
- A shortcut around learning foraging skills
- A guarantee of safety (some toxins have delayed onset beyond the test window)
- Appropriate for mushrooms (never, under any circumstances, use this on fungi)
The UET buys you information, not immunity. If you survive the test without symptoms, the plant part you tested is probably safe for you in reasonable quantities. Probably. That word is doing a lot of work here, and understanding the limits of the test is as important as knowing the steps.
Before You Start: The Prerequisites Nobody Mentions
Three things need to be true before the UET makes any sense at all.
1. You’ve ruled out the obvious killers.
Some plants announce their toxicity with unmistakable warning signs. If the plant has any of these features, don’t test it — just move on:
- Milky or discolored sap (not universal, but enough toxic plants share this trait that it’s not worth gambling)
- Almond-like scent in the leaves or roots (cyanide compounds)
- Beans, bulbs, or seeds inside pods
- Three-leaved growth pattern (the “leaves of three” rule catches most toxicodendron species, though not all)
- Umbrella-shaped flower clusters (the Apiaceae family contains both edible carrots and deadly water hemlock)
- Spines, fine hairs, or thorns (mechanical irritants rather than chemical, but stinging nettle exists)
2. You have 16+ hours to spare.
The UET isn’t a lunch break activity. Rushing it defeats the purpose. The full protocol takes roughly 16 hours from start to finish for one plant part, assuming you don’t eat anything else during the waiting periods. In a real survival situation, this means you’re committing a significant chunk of your remaining energy to testing something you might not even be able to eat.
3. You’ve separated the plant into its individual parts.
This is the step beginners almost always skip. A plant’s root, stem, leaves, buds, and flowers can have radically different chemical profiles. Rhubarb stems are food; rhubarb leaves contain toxic levels of oxalic acid. Potato tubers are a staple crop; potato leaves and green skin will make you sick. Test each part separately, and don’t assume that because the leaf passed, the root is safe.

The 13 Steps of the Universal Edibility Test
Pick one plant. Separate it into parts. Choose one part — only one — to test. Fast for 8 hours before starting. You need a clean system with no competing inputs.
Step 1: Smell It
Crush a small piece of the plant part between your fingers and smell it.
What you’re checking for: Strong, unpleasant, or chemical odors. Anything that smells like almonds (cyanide), peaches (also cyanide compounds), or has an acrid, burning scent is an automatic rejection.
Red flag: If the smell alone makes you recoil, your body is telling you something. Listen to it.
Step 2: Prepare a Test Sample
Take a pea-sized amount of the plant part. If it’s a leaf, tear off a small section. If it’s a root, scrape a small piece. You’re looking for the smallest possible amount that still lets you detect a reaction.
Keep the rest of the plant material sealed and labeled. If you react to the test sample, you want to know exactly which plant and which part caused it.
Step 3: The Skin Contact Test
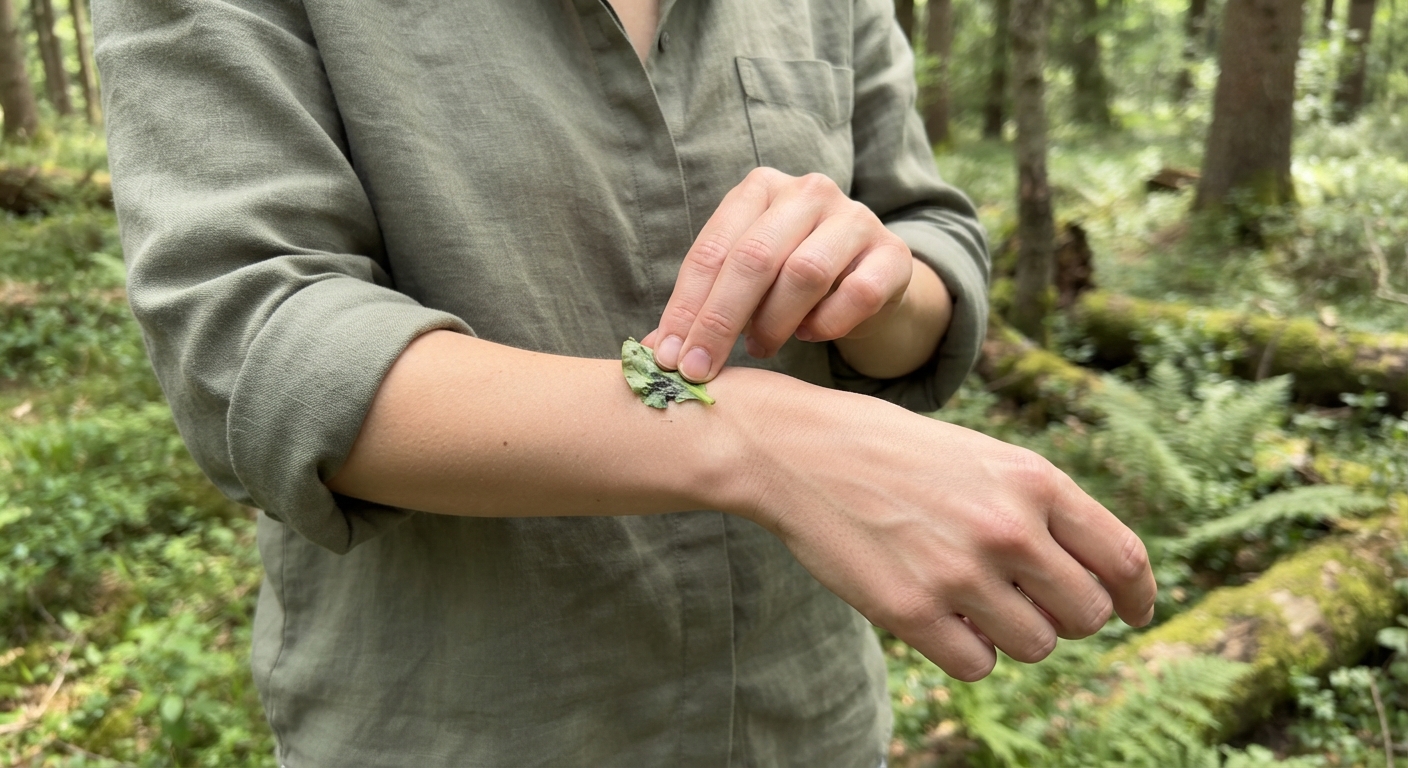
Place the prepared sample against the soft skin of your inner elbow or inner wrist. Hold it there — use a bandage or wrap to keep it in place — for 15 minutes.
What you’re watching for: Any sensation at all. Burning, itching, tingling, numbness, redness, swelling, or blistering. If you feel nothing during the 15 minutes, that’s the result you want. If you feel anything, wash the area immediately with clean water and discard the entire plant.
Why the inner wrist: The skin here is thin and well-vascularized, which means reactions appear faster and more clearly than on thicker skin. It’s the canary in the coal mine for contact irritants.
Common mistake: People get impatient at this stage and skip ahead. Fifteen minutes feels like forever when you’re hungry. But contact dermatitis can take 5-10 minutes to develop, and you want the full observation window. Set a timer and don’t touch it.
Step 4: Prepare a Lip Sample
If the skin test produced zero reaction, prepare another pea-sized sample. This time, you’re moving the test to mucous membranes — the lips — where absorption is faster and sensitivity is higher.
Step 5: The Lip Test
Touch the sample to the outside of your lower lip. Don’t put it in your mouth yet. Hold it there for 3 minutes.
What you’re watching for: The same reactions as the skin test, plus any taste sensations. Strong bitterness isn’t automatically a fail — many edible plants are bitter — but burning, numbing, or chemical tastes are. If your lip feels like it’s swelling, tingling, or going numb, spit the sample out (even though it’s not in your mouth), rinse thoroughly, and reject the plant.
Step 6: The Tongue Test
Place a fresh pea-sized sample on your tongue. Hold it there. Do not chew. Do not swallow. Do this for 15 minutes.
This is the hardest stage to get right. Your instinct will be to chew or swallow. Resist it. The point is to expose your oral mucosa to the plant’s compounds without letting anything reach your stomach. If the plant contains a gastrointestinal irritant, you want zero of it downstream.
What you’re watching for: Any burning, tingling, numbness, or irritation in the mouth. Saliva changes (excessive or absent). Throat tightness. Any of these means wash your mouth thoroughly with water and stop.
Step 7: The Chew Test
If the tongue test produced nothing concerning, take another pea-sized sample. Chew it thoroughly — break it down completely — but still do not swallow. Hold the chewed material in your mouth for 15 minutes.
Why chewing matters: Some plant toxins are only released when cell walls are mechanically broken down. Cyanogenic glycosides, for example, require the plant’s own enzymes to mix with their substrate — and that mixing happens when you chew.
Step 8: First Swallow
Spit out the chewed material from step 7. Take one more pea-sized sample and swallow it.
Now the clock starts. You have officially introduced the plant into your digestive system. Everything before this was surface-level. This is the real test.
Step 9: The Eight-Hour Wait
Do not eat anything else for 8 hours. Drink water, but nothing else.
What you’re watching for: Any symptom at all. Nausea, stomach pain, cramping, diarrhea, vomiting, dizziness, headache, blurred vision, sweating, difficulty breathing, irregular heartbeat. If anything appears, induce vomiting if you know how to do it safely (and if the plant isn’t a corrosive irritant that could cause more damage coming back up), and drink plenty of water.
This is where the UET shows its limitations. Some plant toxins have a delayed onset longer than 8 hours. Pyrrolizidine alkaloids, found in plants like comfrey and various Senecio species, cause cumulative liver damage that won’t show up during a single-day test at all. The UET won’t catch these. It’s designed to catch acute toxins, not chronic ones.
Step 10: The Second Dose
If the 8-hour period passes with zero symptoms, eat a larger amount — roughly a quarter cup of the prepared plant part — and wait another 8 hours.
Why a second dose: Some reactions are dose-dependent. A pea-sized sample might sail through your system unnoticed while a quarter cup triggers a response. You’re testing whether the plant is safe at quantities you might actually eat.
Step 11: Final Observation
During this second 8-hour window, you’re watching for the same symptoms as before. If nothing appears, the tested plant part is probably safe for you to eat — prepared the same way you tested it.
Note the word “probably.” And “prepared the same way.” Cooking changes plant chemistry. A plant that’s safe raw might be toxic cooked (rare, but possible), and vice versa. A plant part that’s safe in small quantities might cause problems if it becomes a staple. The UET answers one question: can I eat this right now, this way, in moderate amounts?
Step 12: Test Other Parts Separately
If the plant has multiple parts — leaves, stems, roots, flowers, buds, seeds — each one needs its own full 16-hour UET. The root is a different chemical entity than the leaf. Passing one does not pass the other.
This is why, in a real survival scenario, you’re almost certainly better off focusing on plants you can positively identify. Running five separate UETs on one plant species would take 80 hours of fasting — that’s three and a half days, during which you’re not eating anything else.
Step 13: Document Everything
If you’re in a genuine survival situation with multiple people, one person can run the test while others conserve energy. But document what you tested, which part, what happened at each stage, and the outcome. If the test goes wrong, that documentation might be the difference between effective treatment and guesswork for whoever provides medical care.
UET vs. Other Plant Safety Approaches: A Comparison
The UET is one tool among several. Here’s how it stacks up against alternatives.
| Method | Time Required | Reliability | Risk Level | Best For |
|---|---|---|---|---|
| Universal Edibility Test | 16+ hours per plant part | Moderate (catches acute toxins, misses delayed/chronic) | Moderate-High | True survival — no other options available |
| Positive Plant ID (Field Guide) | 5–30 minutes | High (if skilled) | Very Low | Everyday foraging with preparation |
| App-Based ID (PictureThis, iNaturalist, etc.) | 1–5 minutes | Moderate (depends on plant, photo quality, and database) | Low | Quick field reference; verify with a second source |
| Local Knowledge / Mentorship | Weeks to months (to learn) | Very High | Very Low | Building reliable foraging skills long-term |
| Observing Wildlife | Hours to days | Very Low (animals tolerate plants toxic to humans) | Very High | Never use this as your sole method |
| Smell-and-Spit (quick field test) | Minutes | Very Low | Very High | Not recommended — insufficient for safety |
| Boiling + Discarding Water | 30–60 minutes | Low-Moderate (removes some toxins, not all) | Moderate | Supplementary step, not a standalone test |
The takeaway from this table: the UET sits in an uncomfortable middle ground — riskier than proper identification, slower than app-based references, and less reliable than local knowledge. Its niche is narrow: you’re in the backcountry with no tools, no prior knowledge of the local flora, no phone signal, and your survival depends on finding food. If any of those conditions aren’t true, there’s a better option.
When NOT to Use the Universal Edibility Test
The UET has failure modes, and some of them are lethal. Here are the situations where running the test is more dangerous than going hungry.
1. Mushrooms and Fungi
Repeat this until it’s automatic: never use the UET on fungi. The deadliest mushroom toxins — amatoxins in Amanita phalloides (death cap), for example — have a latency period of 6–24 hours before symptoms appear. By the time you feel sick, the toxin has already been absorbed and liver damage is underway. The UET’s 8-hour observation window is literally shorter than the delay period of the most dangerous mushroom poisoning. You’d pass the test and die a few days later.
2. Plants You Strongly Suspect Are Toxic
If you have even a reasonable suspicion that a plant is poisonous — based on its features, family, or resemblance to something you know is dangerous — don’t test it. The UET is for truly unknown plants, not for gambling on things that look like hemlock.
3. When You’re Already Dehydrated or Malnourished
Running the UET requires 16 hours of fasting and continuous alertness. If you’re severely dehydrated or haven’t eaten in days, your body is not in a state to process potential toxins safely. The test itself could push you over the edge even if the plant is benign.
4. When You Have Children or Vulnerable People in Your Group
Never test plants on anyone who can’t fully consent to the risk. The UET should only ever be self-administered by a clear-headed adult. Plant compounds that barely affect a 180-pound adult can be dangerous for a 40-pound child.
5. Plants Growing Near Polluted Areas
Even if a plant passes the UET for acute toxicity, it can accumulate heavy metals, pesticides, or industrial runoff. A dandelion growing next to a highway is still a dandelion — chemically safe in itself — but laden with lead and cadmium from decades of exhaust. The UET doesn’t test for bioaccumulation.
7 Common Mistakes People Make With the UET
These are the failure points that show up repeatedly in survival training debriefs.
1. Testing multiple plant parts at once. You can’t interpret symptoms if you don’t know which sample caused them. One part, one test, no exceptions.
2. Eating other food during the waiting period. If symptoms develop, you need to know they came from the test plant, not from the granola bar you ate at hour four. The waiting periods are strict fasts.
3. Rushing the observation windows. Fifteen minutes for skin, fifteen for the tongue, eight hours for the first dose. Time distorts when you’re hungry and anxious, but cutting corners defeats the entire point of the protocol.
4. Assuming a passed test means “safe to eat large quantities.” The UET tests moderate, single-instance consumption. Gorging on a pound of a wild green your body has never processed is a different metabolic challenge.
5. Confusing “no immediate reaction” with “completely safe.” As mentioned, delayed-onset toxins exist. Liver toxins, kidney toxins, and cumulative neurotoxins won’t show up in a one-day test. The UET gives you a probable green light, not a clean bill of health.
6. Testing on damaged or diseased plant material. Rotten, moldy, or insect-damaged plants have different chemistry than healthy ones. Test the plant as you’d actually eat it — healthy and fresh.
7. Not retesting after environmental changes. A plant growing in different soil, at a different altitude, or in a different season can have meaningfully different chemistry. A UET pass on spring leaves from a valley floor doesn’t guarantee safety for late-summer leaves from a mountain slope of the same species.
Quick Reference Card
Copy this, screenshot it, or write it down for your pack. This is the stripped-down, field-ready version.
UNIVERSAL EDIBILITY TEST — QUICK REFERENCE
===========================================

PREREQUISITES:
□ Fast 8 hours before starting
□ Separate plant into parts (root/stem/leaf/bud/flower)
□ Choose ONE part to test
□ NO mushrooms — ever
□ Plant has NO milky sap, almond smell, umbrella flowers,
  three-leaved pattern, spines, or bean-like pods

PROTOCOL:
1. Smell crushed sample → Reject if acrid/almond/chemical
2. Skin test: inner wrist/elbow, 15 min → Reject if ANY sensation
3. Lip test: hold on outer lip, 3 min → Reject if burning/numbing
4. Tongue test: on tongue, DON'T CHEW, 15 min → Reject if any reaction
5. Chew test: chew but DON'T SWALLOW, hold 15 min → Reject if any reaction
6. Swallow pea-sized amount → Wait 8 HOURS, drink only water
   → Reject if ANY symptom (nausea, pain, dizziness, etc.)
7. Eat 1/4 cup → Wait 8 HOURS
   → If no symptoms: plant part is PROBABLY safe

REMEMBER:
• Each plant part needs its own full test
• Cooking may change safety — retest if preparing differently
• "Probably safe" ≠ "definitely safe"
• This is a LAST RESORT, not a shortcut
What to Do If the Test Goes Wrong
If you or someone else develops symptoms during a UET:
Mild symptoms (itching, minor rash, slight nausea):
- Stop the test immediately
- Wash affected skin with soap and water
- Drink clean water to dilute stomach contents
- Activated charcoal if available and appropriate (don’t use with corrosive substances, and never self-administer charcoal if you’re vomiting or drowsy)
- Monitor closely for escalation
Moderate to severe symptoms (vomiting, difficulty breathing, swelling, altered consciousness, irregular heartbeat):
- This is a medical emergency
- If you have any means of communication, use it immediately
- If evacuation isn’t possible, keep the person calm, warm, and hydrated if they can swallow
- Save a sample of the plant — it’s the most valuable diagnostic tool a responder will have
- Note the time of ingestion, quantity, and sequence of symptoms
The Honest Bottom Line
The Universal Edibility Test is a genuine survival tool, but it’s also the least desirable way to determine whether a plant is food. In almost every realistic scenario, you’re better served by:
-
Learning 5–10 common edible plants in your region before you ever need them. The “Big 5” approach — dandelion, cattail, plantain, purslane, and chickweed for most of North America — covers more ground than you’d think.
-
Carrying a regional field guide. A pocket-sized guide weighs a few ounces and answers questions in minutes instead of hours.
-
Taking a foraging course led by someone with generational or professional experience. A weekend with a knowledgeable forager compresses months of trial-and-error into two days.
But if you’re in a situation where none of those options exist — you’re lost, your supplies are gone, and the plants around you are the only available resource — the UET is what you’ve got. Knowing how to run it correctly, and understanding its limitations, could be the thing that gets you home.
FAQ
Can I use the Universal Edibility Test on berries?
Only if you’ve separated the berry from the rest of the plant and tested it independently. The berry, the seed inside the berry, and the plant that produced it are all separate test subjects. Also, the “almond scent” rule applies here — if crushed seeds smell like almonds, reject them.
Why can’t I test mushrooms?
The deadliest mushroom toxins (amatoxins) have a 6–24 hour asymptomatic latency period. The UET’s 8-hour observation window ends before symptoms from lethal poisoning typically appear. You’d pass the test with a green light and develop irreversible liver failure a day later. There is no safe amateur method for testing unknown mushrooms.
Does cooking change the result?
Yes — and this is why the UET specifies testing the plant as you’ll eat it. Boiling can leach out water-soluble toxins; drying can concentrate others; roasting can break down some compounds while creating new ones. If you test a raw leaf and then decide to cook the rest, you haven’t actually tested what you’re about to eat.
How reliable is the UET for long-term survival?
For acute toxins — the kind that make you sick within hours — it’s reasonably effective. For cumulative toxins that build up over days or weeks of repeated consumption, it offers no protection. The UET is a bridge, not a permanent food strategy. The goal in any survival scenario should be to transition from “testing unknown plants” to “harvesting known-safe plants” as quickly as possible.
Can I test multiple plants simultaneously?
Absolutely not. If symptoms develop, you won’t know which plant caused them, and you’ll have wasted time while also potentially making yourself sicker. One plant, one part, one test at a time.
What’s the single most reliable sign that a plant is NOT edible?
There isn’t one. Any universal rule — “white berries are poisonous,” “bitter means toxic,” “if animals eat it, it’s safe” — has enough exceptions to be dangerous. The only truly reliable test is positive identification by someone who knows what they’re looking at. Everything else is risk management, not certainty.