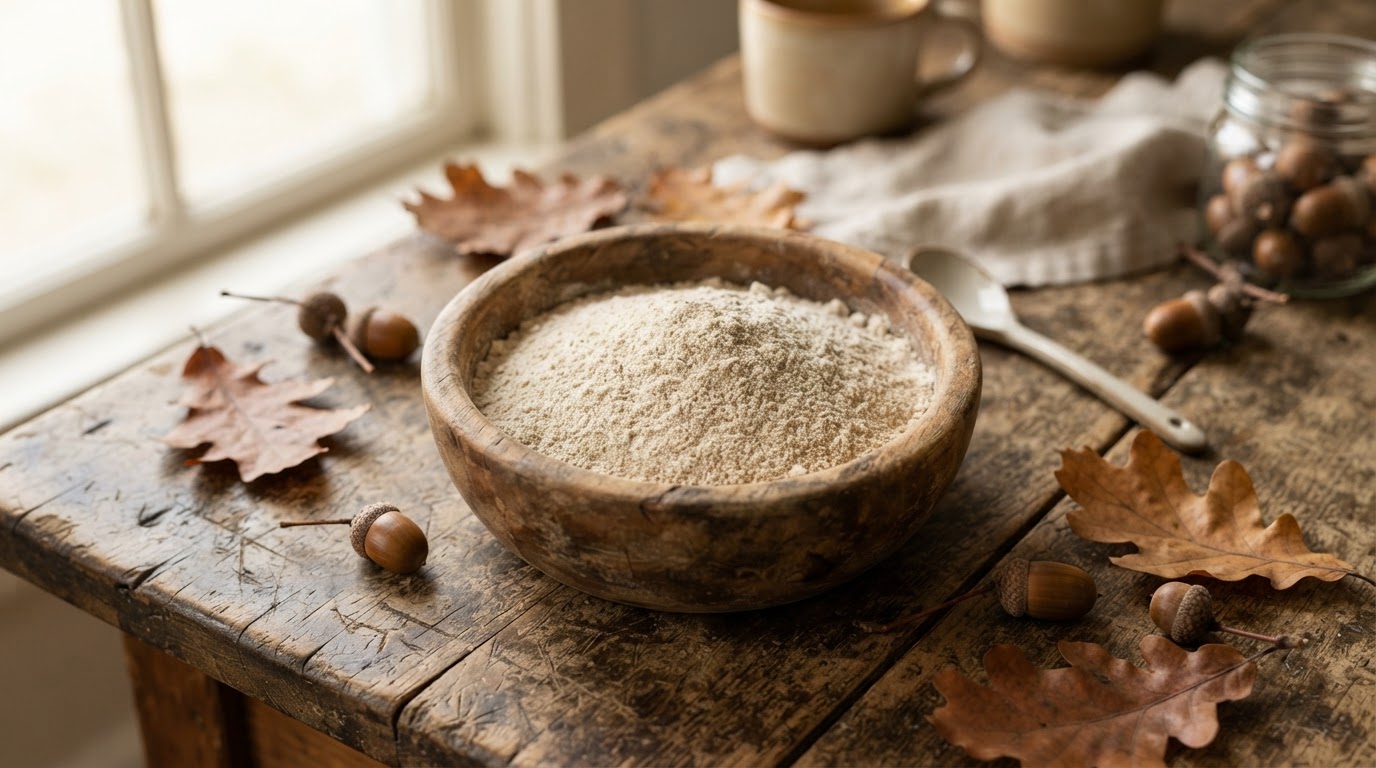
Acorns are one of the most abundant and overlooked wild foods on the planet. Every autumn, oak trees drop billions of pounds of these nutrient-dense nuts — and most of them rot on the ground while people walk right past them to buy overpriced gluten-free flour at the store.
Here’s what most foraging articles won’t tell you upfront: making acorn flour takes patience. It’s not complicated, but you can’t rush the leaching step. Skip it, and your pancakes will taste like you licked a tree. Do it right, and you’ll have one of the most versatile wild flours imaginable — nutty, slightly sweet, and packed with history.
I’ve been processing acorns for about five years now, and I’ve made every mistake in the book. This guide covers everything I wish someone had told me when I started.
Why Bother Making Acorn Flour?
Before we get into the how, let’s talk about the why — because people will ask.
Acorn flour is genuinely impressive nutritionally. Compared to white wheat flour, it contains more fiber, healthy fats, calcium, potassium, and B vitamins. It’s naturally gluten-free, which makes it valuable for anyone with celiac disease or gluten sensitivity. And unlike most commercial gluten-free flours that rely on refined starches and gums, acorn flour is a whole food — one ingredient, nothing processed.
But honestly? The best reason is flavor. Properly leached acorn flour has a rich, nutty taste that’s somewhere between chestnut and hazelnut. It adds depth to baked goods that regular flour simply can’t match.
Quick reality check: One gallon of acorns yields roughly one to two cups of finished flour. This isn’t an industrial-scale operation — it’s a seasonal tradition. Treat it that way, and you’ll enjoy the process instead of resenting it.
Step 1: Identify and Harvest the Right Acorns
Not all acorns are created equal. The first decision you make — which oak species to harvest from — will determine how much work lies ahead.
Best Oak Species for Acorn Flour
| Oak Species | Tannin Level | Flavor Profile | Best For |
|---|---|---|---|
| White Oak (Quercus alba) | Low | Mild, sweet | Beginner-friendly, all-purpose flour |
| Bur Oak (Quercus macrocarpa) | Low | Sweet, buttery | Baking, cookies |
| Chestnut Oak (Quercus montana) | Low | Nutty, mild | Bread, pancakes |
| Red Oak (Quercus rubra) | High | Bold, earthy | Savory dishes, experienced foragers |
| Black Oak (Quercus velutina) | High | Strong, bitter-sweet | Mixed flours, crackers |
| Live Oak (Quercus virginiana) | Medium | Robust | Southern foraging, biscuits |
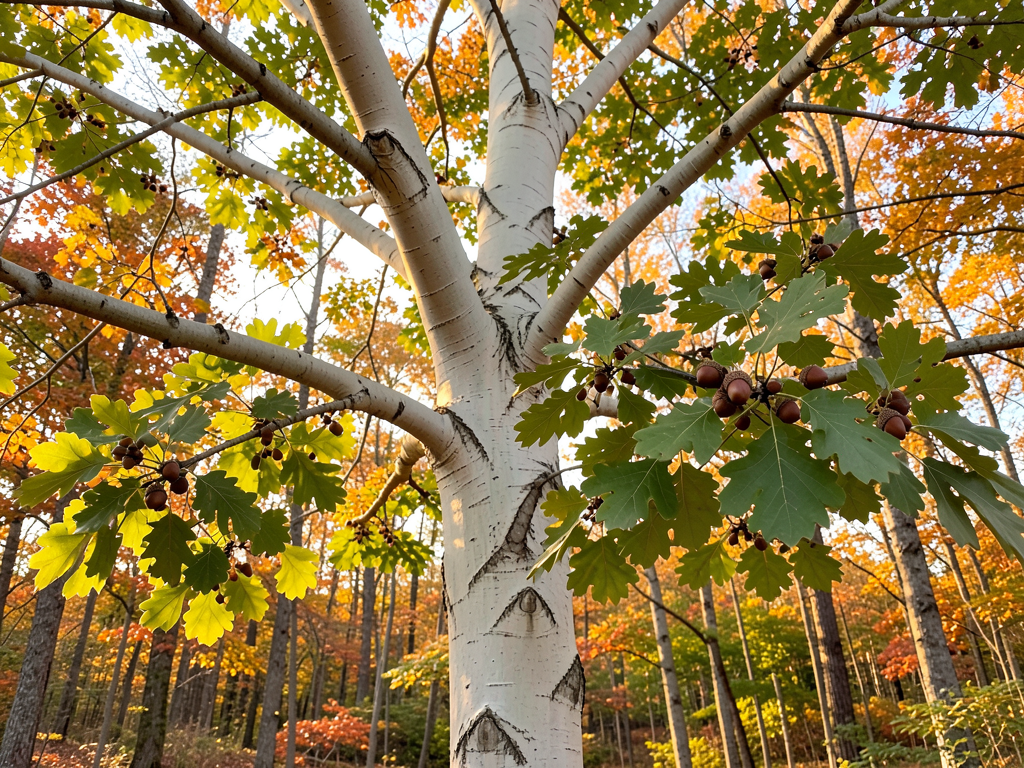
If you’re new to this, start with white oak acorns. They have the lowest tannin content, which means less leaching time and a more forgiving flavor. You’ll find white oaks by their rounded leaf lobes — red oaks have pointed, bristle-tipped lobes.
Harvesting Guidelines
Harvest in early to mid-autumn when acorns turn brown and start falling naturally. Here’s what to look for:
- Pick from the ground, not the tree. Acorns that have fallen are ripe. Green acorns still attached won’t process well.
- The float test: Dump your acorns into a bucket of water. Discard any that float — they’ve been hollowed out by weevils or have dried out internally. Good acorns sink.
- Check for holes: Tiny round holes in the shell mean a weevil has already claimed that nut. Toss it.
- Green caps off: The acorn should separate cleanly from its cap. If the cap is stuck or there’s a spongy green layer, the nut isn’t mature.
- Crack one open: The nutmeat inside should be cream or light tan, firm, and free of black spots or powder. If it looks dark or crumbly, find a different tree.
A single mature oak can drop 200 to 500 pounds of acorns in a good year. You don’t need that much — one five-gallon bucket will keep you busy for an afternoon and yield enough flour for several baking projects.
Step 2: Shell the Acorns
Shelling is the most tedious part of the process. There’s no pretty way around it. You’re going to spend some quality time cracking nuts.
Three Shelling Methods
The hammer method (fastest, messiest): Place acorns on a hard surface, cover with a dish towel to prevent shrapnel, and tap firmly with a hammer. This cracks most shells in one hit but can shatter the nutmeat. Works best for red oak acorns with harder shells.
The nutcracker method (cleanest): A heavy-duty nutcracker works well for most species. It’s slower than the hammer but preserves more whole nutmeats, which makes peeling easier.
The drying-crack method (lowest effort): Spread acorns in a single layer and let them dry for a week. As they dry, the nutmeat shrinks and pulls away from the shell, making them much easier to crack. The trade-off: dried nutmeats are harder, and some people find them slightly more difficult to grind later.
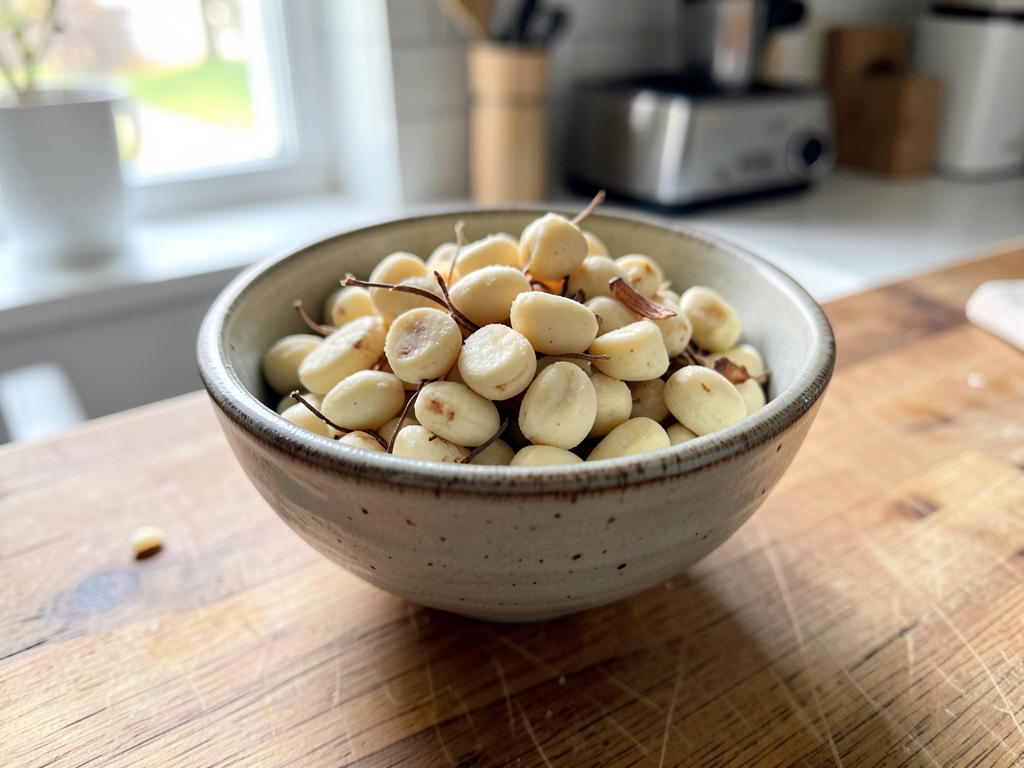
Once cracked, peel away the shell and the thin, papery skin (the testa) surrounding the nutmeat. That skin is bitter and full of tannins — leaving it on means more leaching work. Take the extra minute to remove it now.
Hot water trick: Briefly blanch shelled acorn meats in boiling water for 30 seconds. The skins slip off much more easily. This also starts the leaching process, which is a bonus.
Step 3: Leach the Tannins (The Critical Step)
This is where most people screw up. Acorns contain tannins — polyphenolic compounds that make them bitter, astringent, and in very large quantities, potentially harmful to your kidneys. Leaching removes these tannins.
There are two main methods. I’ll explain both, but I strongly recommend the cold-water method for beginners.
Cold Water Leaching (Recommended)
Cold water leaching preserves the starches in the acorns, which means your flour will bind together better in baking. Hot water washes those starches away and can cook the nutmeats, giving them a slightly different texture.
What you need:
- A blender or food processor
- A large glass jar or bowl
- Cheesecloth, a fine mesh strainer, or a clean pillowcase
- Fresh, cold water
Instructions:
- Grind the shelled acorns into a coarse meal in your blender. Add just enough water to help them blend. You want a consistency like wet sand — not a smooth paste.
- Transfer the meal to a large jar or bowl and cover with cold water by about three inches.
- Wait. Let it sit in the refrigerator. The acorn meal will settle, and the water will turn amber-brown — that’s the tannins leaching out.
- Change the water once or twice a day. Pour off the dark water carefully so you don’t lose the settled meal, then add fresh cold water.
- Taste test daily. Take a tiny pinch of the meal and taste it. If it’s bitter, keep leaching. When it tastes bland or slightly nutty with zero bitterness — usually after 3 to 7 days for white oak, or 7 to 14 days for red oak — it’s ready.
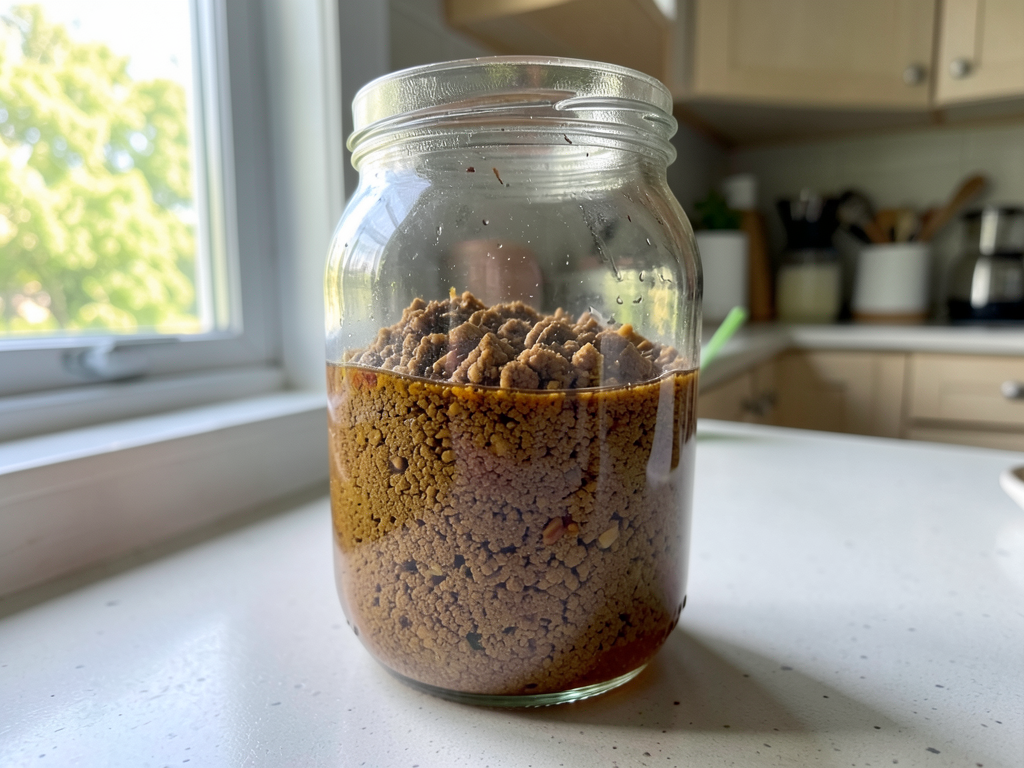
The refrigerator is important here. At room temperature, acorn meal can ferment or grow mold within 48 hours. Keep it cold.
Hot Water Leaching (Faster but Lower Quality)
If you need flour today and can’t wait a week, hot water leaching works. I use this method for savory applications where binding isn’t critical — think crackers, soup thickeners, or acorn-crusted fish.
- Shell and coarsely grind the acorns.
- Place the meal in a pot and cover with water.
- Bring to a boil, then simmer for 15 minutes.
- Strain through cheesecloth, discarding the dark water.
- Repeat 3-6 times until the water runs mostly clear and the meal tastes neutral.
Hot leaching is faster — you can finish in one afternoon — but the resulting flour will be grittier and won’t hold together as well in breads. It also cooks out some of the natural oils, which affects flavor.
How to Tell When It’s Done
Your tongue is the best tool here. Properly leached acorn meal should taste:
- Mild and nutty — no bitterness at all
- Slightly starchy — like raw chestnut
- Clean — no astringent, drying sensation on your tongue
If your mouth feels dry or puckered after tasting, keep leaching. That’s residual tannin.
Step 4: Dry the Acorn Meal
Wet acorn meal will mold within days if not dried properly. You need to get the moisture content low enough for shelf-stable storage.
Spread the leached, drained meal thinly on baking sheets. You have three drying options:
Oven drying (fastest): Set your oven to its lowest temperature — ideally 150°F to 170°F (65–75°C). Spread the meal no more than a quarter-inch thick. Stir every 30 minutes. Total time: 2 to 4 hours. The meal will clump as it dries, which is exactly what you want.
Dehydrator (easiest): Spread on dehydrator trays at 135°F (57°C) for 4 to 8 hours. Stir once or twice. This gives you the most consistent results with the least attention.
Air drying (slowest, traditional): Spread on a clean cloth in a warm, dry, well-ventilated area. Stir several times a day. This can take 2 to 3 days depending on humidity. Only use this method if you live in a dry climate.
The meal is dry enough when it feels completely dry to the touch and doesn’t clump when you squeeze a handful. If it feels cool or damp in your palm, it needs more time.
Step 5: Grind Into Flour
Once completely dry, the meal needs one final grind to become actual flour.
A high-speed blender (like a Vitamix) works beautifully — blitz the dried meal in batches until it reaches a flour-like consistency, usually 30 to 60 seconds per batch. A coffee grinder also works for small quantities but takes longer. For the truly dedicated, a grain mill produces the finest, most consistent results.
Sift the flour through a fine mesh strainer to catch any larger pieces. Re-grind those larger bits and sift again. The final product should feel similar in texture to whole wheat flour — slightly coarser than white flour, but fine enough to use in most recipes.
Step 6: Store Your Acorn Flour
Acorn flour contains natural oils that can go rancid over time. Proper storage matters.
- Refrigerator: Store in an airtight container for up to 3 months.
- Freezer: Store in a freezer-safe container or vacuum-sealed bag for up to 1 year. This is what I do — I process a big batch in the fall and work from the freezer all year.
- Room temperature: Only store at room temp if you’ll use it within 2 weeks. Keep it in a dark, cool pantry in a sealed jar.
Label your container with the date and oak species. You’ll thank yourself later when you’re wondering whether that bag from last November is still good.
Acorn Flour Recipes and Uses
Now for the fun part. Here are a few ways to use your hard-earned flour.
Simple Acorn Pancakes
Mix 1 cup acorn flour with 1 egg, 1/2 cup milk, 1 tablespoon honey or maple syrup, 1 teaspoon baking powder, and a pinch of salt. Cook on a buttered griddle until golden. These have a deeper, earthier flavor than regular pancakes — serve with wild berry compote for the full foraging experience.
Acorn Bread
Replace up to 50% of the wheat flour in any bread recipe with acorn flour. More than that and the loaf won’t rise properly because acorn flour has no gluten. I make a rustic loaf with 2 cups wheat flour, 1 cup acorn flour, 1 1/4 cups warm water, 2 teaspoons yeast, 1 tablespoon honey, and a teaspoon of salt. It comes out dense, nutty, and incredible with butter.
Acorn Crackers
Acorn flour really shines in crackers. Mix 1 cup acorn flour, 1/4 cup olive oil, 1/4 cup water, and a generous pinch of salt. Roll thin, cut into squares, and bake at 350°F for 12-15 minutes. Sprinkle with rosemary and sea salt before baking. These will ruin store-bought crackers for you.
Acorn Coffee (Bonus)
Not a flour recipe, but too good not to mention. Roast whole, shelled acorn meats at 350°F for 30-40 minutes until dark brown. Grind and brew like coffee. It’s caffeine-free with a rich, nutty flavor. Some people mix it 50/50 with regular coffee for a half-caf version.
Substitution Ratio
As a general rule, replace 25-30% of the flour in any recipe with acorn flour. For pancakes and flatbreads, you can push it to 50%. For delicate baked goods like cakes and cookies, stick to 25% or the texture will suffer.
Since acorn flour has no gluten, adding one egg per cup of acorn flour helps with binding in recipes where you’re substituting more than 25%.
Common Mistakes to Avoid
I’ve made every one of these, and I’m telling you so you don’t have to.
Rushing the leaching: This is the number one mistake. If your flour is bitter, you didn’t leach long enough. There’s no shortcut here. Taste it. Trust your tongue.
Using moldy acorns: If your acorns have been sitting on damp ground for weeks, they may have invisible mold. The float test catches the worst ones, but trust your nose too. Good acorn meats smell nutty and clean. If they smell musty or sour, toss the whole batch.
Skipping the drying step: Wet acorn meal will mold in your cabinet within days. You must dry it completely before storing. No exceptions.
Using 100% acorn flour in bread: Unless you’re making flatbread, this won’t work. Acorn flour has no gluten and won’t rise. Always blend it with wheat flour for leavened breads.
Storing at room temperature too long: Acorn flour goes rancid faster than wheat flour. Freeze what you won’t use within two weeks.
Forgetting to remove the skins: The papery skin around acorn nutmeats is loaded with tannins. Leaving them on means triple the leaching time. Peel them off.
Nutritional Breakdown
Here’s what you’re getting in every cup of acorn flour (roughly 100g):
| Nutrient | Amount |
|---|---|
| Calories | ~390 |
| Protein | 6-8g |
| Fat | 20-24g (mostly healthy unsaturated fats) |
| Carbohydrates | 45-50g |
| Fiber | 8-12g |
| Calcium | 40-50mg |
| Potassium | 500-700mg |
| Magnesium | 60-80mg |
| Vitamin B6 | 0.5-0.7mg |
Compared to white wheat flour, acorn flour has roughly 5x the fiber, 4x the potassium, and significantly more healthy fats. It’s not a complete protein source, but it’s a meaningful upgrade over most refined flours.
Frequently Asked Questions
Can I eat acorns raw? No. Raw acorns contain high levels of tannins that taste terrible and can cause stomach upset. Always leach them first.
How long does the whole process take from start to finish? With cold water leaching: 4 to 8 days (mostly passive waiting time while the meal soaks). Active work maybe 2 to 3 hours. With hot water leaching: one afternoon.
Can I use acorn flour if I have a nut allergy? Acorns are tree nuts, so anyone with tree nut allergies should avoid acorn flour or consult their allergist first.
What does acorn flour taste like? Properly leached, it has a mild, nutty flavor similar to chestnut or hazelnut — slightly sweet, earthy, and warm. Poorly leached, it tastes like sucking on an aspirin tablet.
How much flour does one gallon of acorns produce? Roughly 1 to 2 cups of finished flour. It varies by species and size. Red oak acorns tend to be larger and yield more per acorn but require longer leaching.
Can I forage acorns in a city park? Yes, but be mindful of pesticides and herbicides. Parks that spray chemicals on lawns or trees may contaminate the acorns. Stick to wild areas, forests, or your own neighborhood trees when possible.
Do all oak species produce edible acorns? Yes — every oak species produces acorns that are edible after proper leaching. Some are just a lot more work than others.

The Bottom Line
Making acorn flour is a weekend project that connects you to a food tradition thousands of years old. It’s not the most efficient way to get flour — the grocery store wins that contest every time. But efficiency isn’t the point.
The point is standing in your kitchen with a jar of flour you made from nuts you gathered, knowing exactly where your food came from and exactly what went into it. That’s something no store-bought bag of flour can offer.
Start with white oak acorns. Take your time leaching. Taste as you go. And when you make your first batch of acorn pancakes, drizzle them with real maple syrup — you’ve earned it.