How to Cook Stinging Nettles Safely (Without Getting Stung)
You’ve heard the pitch a dozen times: stinging nettles are one of the most nutritious greens on the planet, free for the picking, and tastier than spinach. So you picked a bagful — or you’re about to — and now you’re standing in your kitchen holding a plant that actively bites back, wondering two very reasonable things: will this stop stinging if I cook it? and how do I do this without my hands on fire for the rest of the day?
Fair questions. And the internet answers them badly. Half the recipes tell you to “handle gently and blanch” without explaining why, and the other half suggest things that end with a mouthful of stung tastebuds. I’ve made most of the mistakes already — grabbed a nettle barehanded out of overconfidence, blended raw leaves into a smoothie I regretted in real time, dried a batch that wasn’t fully dry. Consider this the guide I wish had existed back then.
By the end of this page you’ll know exactly how to get nettles from forest floor to dinner plate with zero stings: how to identify the right plant, how to pick and carry it, what actually destroys the sting (heat, drying, crushing — and why), how long to cook them, five reliable ways to eat them, and the handful of ways this still goes wrong for people even after cooking.
The short version, if you’re already standing at the stove: cooking kills the sting. Boil, steam, or sauté the leaves for a few minutes and the stinging hairs are done. Raw nettles sting. Cooked nettles are food. Everything below is the how and the why.
What Actually Makes Nettles Sting (and What Kills It)
Ten seconds of science makes every step in this guide make sense, so bear with me.
A stinging nettle is covered in tiny hollow hairs called trichomes. Each one is basically a glass needle made of silica, stiff enough to stab skin, hollow like a hypodermic, and topped with a little bulb that breaks off when you brush against it. When it snaps, the needle injects a small cocktail of irritants — formic acid, histamine, acetylcholine, and serotonin — straight into your skin. That’s the burn. It’s mechanical. The plant is literally injecting you with needles you can only see under magnification.
Which tells you exactly what works against it:
- Heat destroys the sting. Cooked trichomes are no more dangerous than cooked hair. Simmer, steam, or sauté for a few minutes and the whole apparatus is neutralized. This is the core skill of this entire article.
- Drying destroys the sting. Fully dried nettle leaves are limp, brittle, and stingless. That’s why dried nettle tea has been sold for centuries.
- Crushing destroys the sting. The needle has to physically break off before touching skin to be harmless. That’s why chewing, blending, or pounding works — but the crushing has to be thorough, or you’ll find the one intact needle. (More on the smoothie mistake later.)
- What doesn’t work: rinsing with cold water, patting dry, “being gentle,” refrigerating, lemon juice, a brief hot-water dip that doesn’t really cook them, and wishful thinking. Washing nettle makes it wet, not safe.
One more thing worth knowing before you cook: heating also unlocks the nutrition. Raw, some of nettle’s minerals stay locked behind those hairs and cell walls. Cooked, you get easy access to the iron, calcium, vitamins A, C, and K, and a surprising amount of protein for a leaf — around 2–3 grams per cooked 100 g, which puts it in the same conversation as spinach but with a deeper, more savory flavor. Most people describe cooked nettle as “spinach, but earthier and a little nutty.” That’s the flavor you’re working toward.
Step 1: Get the Right Plant (Positive ID Before You Ever Touch It)
Here’s the mistake that matters more than anything in the kitchen: deciding a plant is a nettle after you’ve picked it. Identification happens in the field, with the plant rooted in front of you, before a single leaf goes in the bag. Once leaves are picked, you’ve lost the growth pattern and the context that make ID honest.
True stinging nettle (Urtica dioica) looks like this:
- Leaves in opposite pairs — two leaves per node, directly across from each other, all the way up the stem.
- Oval to heart-shaped leaves, 2–6 inches, with serrated (toothed) edges and a sharply pointed tip.
- A square-ish stem (nettle sits in its own family, but the square stem throws people off toward mint) covered in the famous stinging hairs — on the stem, on both sides of the leaves.
- Height of 2 to 7 feet in good soil, often in dense patches near moist, rich ground: riverbanks, forest edges, old farmsteads, trail sides.
- The obvious test: touch one with a gloved finger and hold it a second. Stinging nettle announces itself.
The lookalike situation is genuinely good news: there’s no deadly nettle mimic. The confusion is mostly between stinging nettles and harmless plants that look like them, plus one or two mildly nasty copycats. Here’s the honest comparison:
| Plant | Does it sting? | Leaves look like | How to tell in 5 seconds |
|---|---|---|---|
| Stinging nettle (Urtica dioica) | Yes | Opposite pairs, serrated, pointed tip, hairs on both sides | Gloved touch = sting; opposite leaves |
| Wood nettle (Laportea canadensis) | Yes | Similar, but leaves alternate up the stem, wider, hairs mostly on top | Alternate arrangement is the giveaway — also edible when cooked |
| Dead nettle / henbit (Lamium spp.) | No | Rounded, crinkled, mint-family square stem, low-growing | Rub one barehanded — nothing happens; edible raw |
| False nettle (Boehmeria cylindrica) | No | Almost a carbon copy of stinging nettle | No sting when touched barehanded; edible |
| Hemp nettle (Galeopsis tetrahit) | Stiff bristles, irritates some people | Coarse bristly hairs, swollen stem joints, unpleasant smell | Bristles feel like Velcro, not needles; not a true nettle — skip it |
| Spurge (Euphorbia seedlings) | No, but toxic | Tiny oval opposite leaves, low sprawling reddish stems, easy to confuse with nettle seedlings | Snap a stem: white milky sap = never eat |
Read that table until the pattern sinks in: if it stings, it’s a nettle, and nettles are food once cooked. If it doesn’t sting but looks like one, it’s usually edible too — except spurge, which you identify by the white sap. The real risk isn’t poison; it’s misidentification by someone who grabbed “some green thing with teethy leaves.” Take the five seconds. If you’re still building your ID confidence in the field, an offline plant ID app is a legitimate safety layer here — more on that at the end.
Step 2: Harvest and Transport Like Someone Who’s Done It Before
Nettle patches have opinions. Respect them and harvesting takes ten painless minutes.
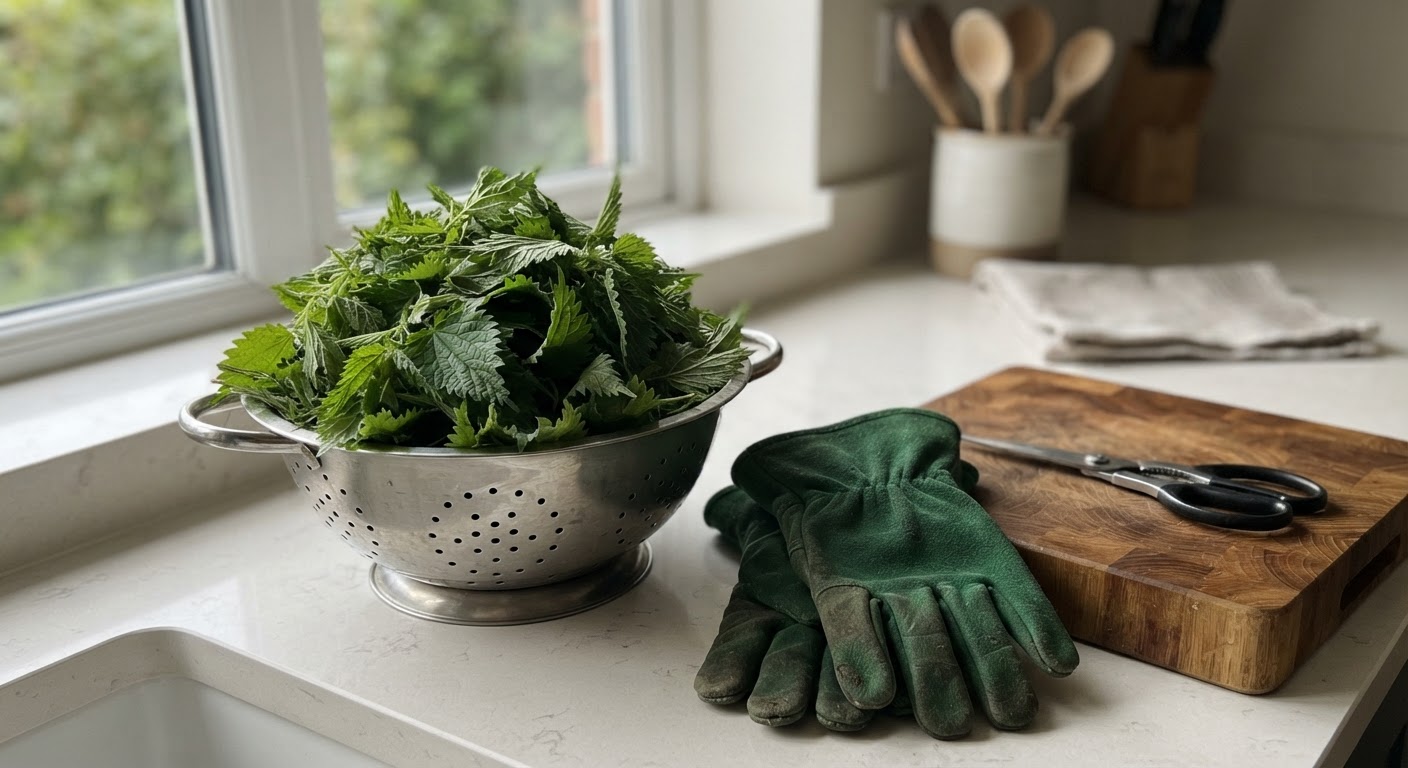
Gear: thick gloves (dish gloves worn over garden gloves is the gold standard), scissors or snips, and a rigid container — a basket, a paper bag, a canvas tote. Not a plastic grocery bag you have to squeeze leaves into.
What to take: the top 4–6 inches of each stem. This is the tender, sweet, actively-growing part of the plant. Below that, stems get fibrous and leaves get gritty with age. Snip above a leaf pair and the plant branches out — you’re basically pruning it into producing more of exactly what you want.
What to skip:
- Flowering or seeding plants. Once nettle flowers (late spring onward), leaves get tough and develop gritty compounds called cystoliths. If your patch has flowered, look for fresh regrowth on cut stalks instead.
- Anything within 20-ish feet of a busy road, any spot that’s clearly a dog restroom, and anywhere that might be sprayed. Same plant, different safety profile depending on the soil it grew in.
- The whole patch. Take a top here, a top there. The patch regrows; you get a second harvest in a few weeks.
Transport rule: don’t crush the nettles into the container. Crushed leaves mean broken trichomes, and broken trichomes sting everything they touch — your bag, your other groceries, your forearm when you reach in. Loose, upright leaves in a rigid basket sting nothing but the gloves. Also check the bag for stowaways; aphids and small caterpillars love nettle tips as much as we do, and they ride home quietly.
Step 3: Prep Without Getting Stung
Kitchen prep is where first-timers get stung, because they take the gloves off too early. The sting is alive until heat or full drying kills it, so:
- Keep the gloves on through washing. Fill the sink with cold water, swish the nettles around with tongs (or gloved hands), lift them out, drain, repeat once if they’re dusty. Bugs float off or surface and you can skim them.
- Drain well. A salad spinner works if the leaves fit; otherwise a colander and a shake.
- Strip leaves off coarse stems. Pinch or snip the leaf cluster off the main stem — gloves still on. Young tops can go in whole.
- Now choose your lane: either cook them as-is, or blanch first and then work barehanded. This is the trick that changes everything — once nettles are blanched, you can handle them with naked hands like cooked spinach. Most experienced nettle cooks blanch the whole haul the day it’s picked, precisely so the rest of the cooking session is sting-free.
That last point is the single biggest quality-of-life upgrade in this entire guide: stop trying to chop raw nettles with bare fingers. Blanch first, then the plant is just food.
Step 4: Kill the Sting With Heat (The Core Step)
This is the step the whole article is named for, so let’s be precise.
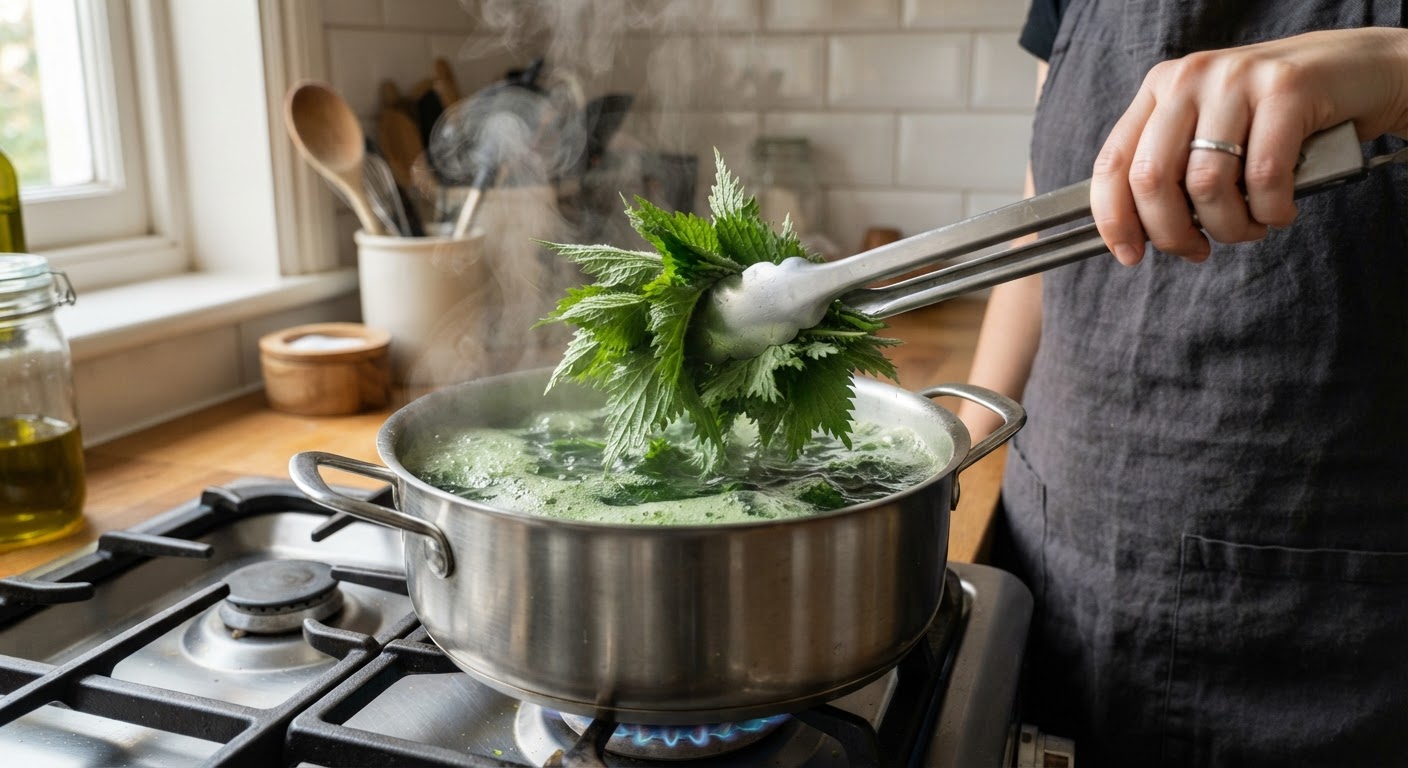
Blanching — the standard method. Drop nettles into a pot of already-rolling boiling water and keep them at a full boil for 2 to 3 minutes. They’ll collapse instantly, turn an almost unnatural deep green, and go completely soft. Pull them out, and optionally shock them in ice water if you want that color screaming green for a cold dish or the freezer. That’s it. Sting over.
Why the full rolling boil matters: the heat needs to physically destroy the trichomes and denature the irritating compounds. A brief dip in hot-but-not-boiling water — the kind of blanch people give regular spinach — is exactly the half-measure that produces “cooked” nettles that still sting. Two to three minutes at a real boil. Set a timer; don’t eyeball it.
About the blanching water: here’s something most recipes won’t tell you. Boiling disarms the leaves, but the irritants and bitter compounds that leach out are now in the water. Older recipes blithely say “use the cooking water for soup or tea.” The safer practice — and the one that also tastes better — is to discard the blanch water (your garden plants will appreciate it, diluted, as fertilizer) and build flavor from the blanched leaves themselves. If you want nettle soup, you’ll simmer the blanched leaves in fresh broth. Nothing is lost; bitterness is.
Other heat methods, all of which kill the sting completely:
- Steaming, 3–4 minutes — leaves stay brighter and slightly firmer than boiled; no water to discard. My pick when the nettles are young and spring-fresh.
- Sautéing after a blanch, 3–4 minutes with butter or olive oil and garlic. Sautéing raw nettles works too but is fiddly — raw leaves are bulky and you’re flipping them with tongs while they sting through spatulas. Blanch first, then sauté. Same dish, zero drama.
- Simmering directly in soup, 5–10 minutes — raw nettles can go straight into a simmering pot of broth; a long enough simmer fully cooks them. This is the traditional path and it’s completely safe as long as they actually simmer, not just float in hot water.
- Baking into things — nettle fillings for ravioli, spanakopita, and savoury pies all start from blanched nettles anyway, so the sting dies at step one.
One method that does not reliably work: the raw green smoothie. A high-powered blender mostly crushes the trichomes — but “mostly” is a terrible word in this context. Enough intact needles survive a quick blend to sting your lips, mouth, and throat, and people do this to themselves every single spring. If you want nettle in a smoothie, blanch the leaves first (30 seconds in boiling water, cool them, freeze in portions), then blend. Same nutrition, same green color, no needles.
Step 5: Turn Them Into Dinner (Five Ways That Never Fail)
Once you’ve got a colander of blanched nettles, you’re ten minutes from any of these. They’re ordered roughly by how often I actually cook them.
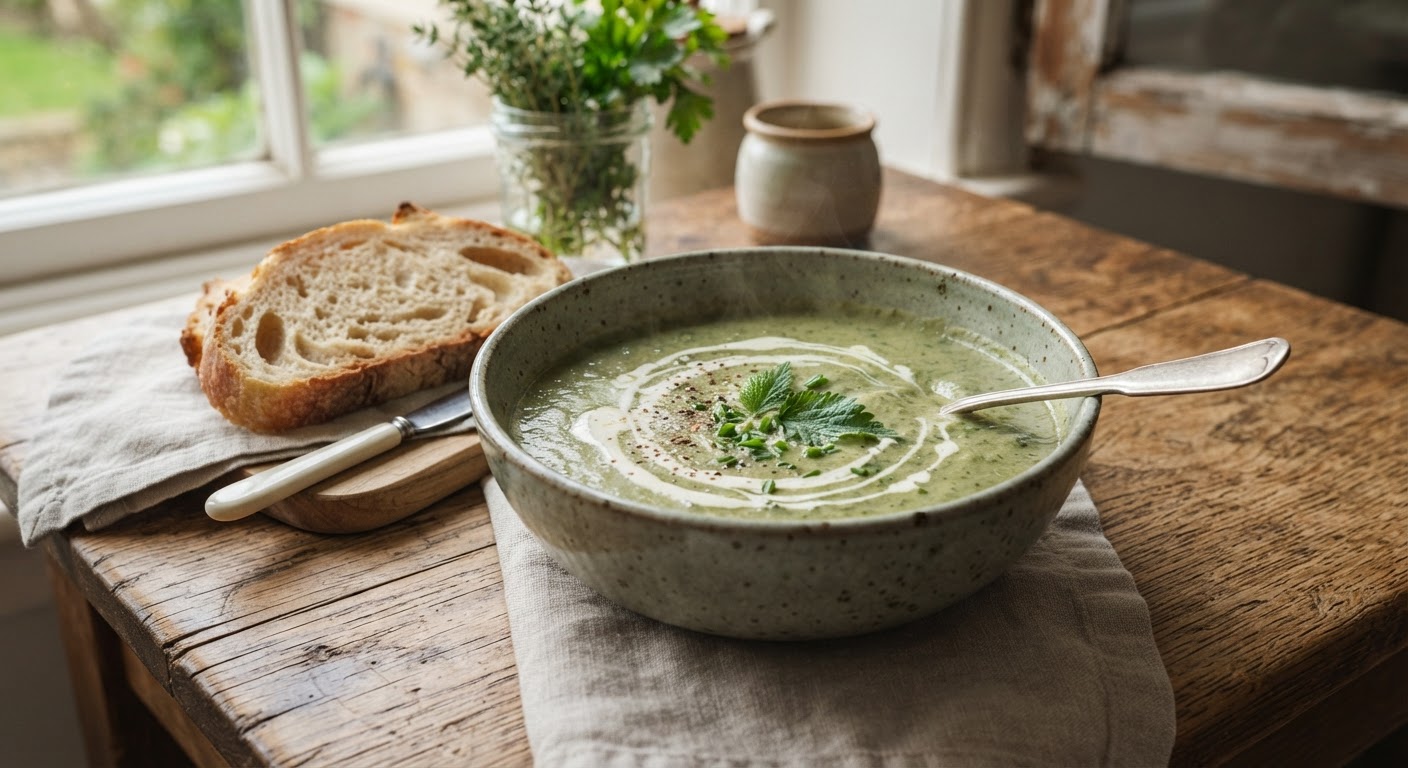
1. Nettle soup — the classic, and the best first nettle meal. Sweat an onion and a potato in butter, add broth, add your blanched nettles, simmer 10 minutes, blend until velvety, finish with cream and black pepper. The potato does the thickening, the nettle supplies a deep green, savory flavor that makes people at the table ask what’s in it. Serve with bread; watch skeptics convert.
2. Nettle pesto. Blanched nettles, garlic, parmesan, lemon juice, olive oil, blitz. Use pine nuts, walnuts, or sunflower seeds. It’s darker and earthier than basil pesto and it makes pasta taste expensive. Freezes beautifully in an ice-cube tray — one cube per future bowl of pasta.
3. Garlic-butter nettle greens. The weeknight move. Blanch, squeeze dry, chop coarsely, then 3–4 minutes in a hot pan with butter, sliced garlic, and a squeeze of lemon. Finish with salt. Treat it exactly like you’d treat spinach — it behaves identically once cooked, just with more flavor per bite.
4. Nettle filling — ravioli, spanakopita, quiche. Blanch, squeeze very dry (this matters more than any recipe admits; press the water out or the filling weeps), chop, mix with ricotta or feta, egg, and nutmeg. Now it’s Greek pie night or Italian night, depending on the dough situation.
5. Nettle chips. Toss dried-off leaves (or whole young tops) with a little oil and salt, spread in a single layer, low oven (about 250–275°F / 120–135°C) until brittle, 15–25 minutes. Snacky, weirdly addictive, and a great way to convince teenagers that foraging has a payoff.
And running quietly under all of it: nettle tea from fully dried leaves — grassy, slightly sweet, zero sting, and the best use for a bigger harvest than you can eat fresh. More on drying in the next step.
| Method | Sting killed? | Time | Best for | Flavor & texture |
|---|---|---|---|---|
| Blanching | Yes | 2–3 min | Freezer prep, pesto, any recipe | Mild, spinach-like, deep green |
| Simmering in soup | Yes | 5–10 min | Soups, broths | Soft, soaks up broth flavor |
| Steaming | Yes | 3–4 min | Simple side dish | Bright, delicate, intact leaves |
| Sauté (after blanch) | Yes | 3–4 min | Garlic-butter greens | Sweet, nutty, caramelized edges |
| Drying | Yes — when fully dry | 2–3 days air / hours in dehydrator | Tea, seasoning | Hay-like, grassy-sweet |
| Raw / blended | Unreliable | — | Not recommended | Stings the mouth if under-processed |
One small seasonal note, because cooking nettle is a seasonal sport:
| Time of year | What you’re getting | Kitchen note |
|---|---|---|
| Early spring | 6-inch tender tops, sweet and soft | The best of the year — eat simply, don’t hide it in a heavy dish |
| Late spring | Bigger leaves, more fiber | Blanch and purée — pesto and soup territory |
| Summer (flowering) | Fibrous, gritty leaves | Leave the patch for the bees; take only fresh regrowth tips |
| Fall | New growth after cutting | A second spring — young tops again, cooks like early spring |
Step 6: Store the Extras (and the Drying Rule That Matters)
You’ll come home with more nettle than dinner needs. Good. Storage is easy, with one hard rule.
- Blanched, in the fridge: 3–5 days in a container. Squeeze out the water first; wet greens slime faster.
- Blanched, in the freezer: the workhorse. Flatten blanched nettles into zip bags in thin sheets — they break off in perfect recipe-sized chunks months later. Or freeze puréed nettles with a little water in ice-cube trays. Frozen blanched nettle thaws tasting like nettle, not like regret.
- Dried, for tea: here’s the hard rule — dry them completely or don’t dry them at all. Spread leaves in a single layer on a screen or towel in a warm, airy room out of direct sun, with a fan if you have one. Takes 2–3 days. The leaves must crumble when you squeeze them — no bend, no soft spots. Anything less and you’re storing a jar of mold-in-progress, and nettles are hairy enough to hide moisture like nothing else I’ve dried. When they pass the crumble test, jar them, label them, keep them out of sunlight. Fully dried nettle tea is stingless and keeps for a year.
There’s also a lazy-genius storage trick worth stealing: freeze the bag whole. Toss the entire bag of nettles into the freezer as-is. Hours later, the frozen leaves strip off their stems with a bare-handed flick — the sting is dead, the hairs just brush away, and you’re left with a bag of frozen leaves ready to blanch whenever. It feels wrong the first time. It works every time.
What Can Still Go Wrong (Even After Cooking)
Cooking solves the sting. It doesn’t solve everything, and this is the section that separates people who cook nettles once from people who cook them every spring.
- The raw smoothie trap. Covered above, but it bears repeating because it’s the most common “but it’s healthy!” self-sting of the season. Blanch first. Always.
- Medication interactions. Nettle is genuinely potent stuff — it’s mildly diuretic and can interact with blood thinners, blood pressure medications, and diuretics. A cup of tea now and then is one thing; drinking it by the liter while on these meds is another. If you’re on regular medication, ask your doctor before making nettle a daily habit.
- Pregnancy. The standard advice across credible sources: skip medicinal amounts of nettle during pregnancy. Culinary portions of cooked nettle in food are generally considered fine, but this is an “ask your midwife, not a blog” topic.
- Mature, gritty leaves. Leaves from flowering plants contain cystoliths — tiny mineral deposits that feel like sand on your teeth no matter how you cook them. If your nettle dish is crunchy in a wrong way, that’s why. Young leaves only.
- The ID shortcut. Everything in Step 1 still applies. Cooking a misidentified plant doesn’t make it the right plant.
- First-timer portions. Nettle is food, but it’s a new food to most bodies. First meal: a normal side-dish portion, not a nettle-feast. Some people get mild digestive pushback from a big first serving. The same advice applies to any new wild green.
Pro Tips From a Few Seasons of Nettle Dinners
The small stuff that makes the difference between “edible” and “I’m making this again next week”:
- Blanch the whole haul on day one. Even if you’re only making tea or freezing. One 10-minute session and everything in your kitchen becomes safe to touch. It’s the closest thing nettle cooking has to a cheat code.
- Ice bath after blanching = restaurant color. Not required for safety, but if the dish is cold or the green matters (pesto, soup garnish), shock them.
- Squeeze harder than you think. Blanched nettles hold an absurd amount of water. For pesto and fillings, squeeze until you’re sure you’ve overdone it. You haven’t.
- Pair with fat, acid, and salt. Nettle’s flavor is deep but quiet. Butter or olive oil, lemon or vinegar, and a confident hand with salt are what make it sing.
- Soup first, pesto second, everything else later. If you’re introducing family members to wild greens, soup is the gateway — blended, creamy, familiar texture, nobody can psychologize themselves out of it.
- The glove-off test. Not sure if your blanch was long enough? Touch a leaf with your bare fingertip and wait 30 seconds. If nothing happens, the batch is done. Nettles are honest like that.
- Mark your patch in spring. Nettles come back from the same roots every year. Where you harvest this April, you’ll harvest next April — usually earlier and thicker.
Quick Answers Before You Cook
Do nettles still sting after cooking? No. Any real cooking method — boiling, steaming, sautéing, simmering, baking, or thorough drying — destroys the stinging hairs. Cooked nettles are as harmless as cooked spinach.
Can you eat stinging nettles raw? Technically some people do, by carefully folding leaves to point the needles away or crushing them thoroughly. I don’t recommend it, and blended raw nettles in smoothies are a known way to sting your mouth and throat. Blanch first; it takes 30 seconds.
How long do you have to boil nettles to kill the sting? 2–3 minutes at a rolling boil. That’s the standard, and it doubles as the perfect texture for most recipes. A longer simmer (5–10 minutes) when they’re in soup works too.
What part of stinging nettle do you eat? The top 4–6 inches of the plant — the tender growing tip and upper leaves. Lower leaves are edible but tougher; mature stems are fibrous and not worth eating.
Why is my cooked nettle gritty or sandy-tasting? Your nettles were mature — past flowering — and full of cystoliths, tiny mineral deposits in the leaves. Next time harvest younger growth, or take only fresh regrowth tips from a cut patch.
Is dried nettle tea safe from stings? Yes, as long as the leaves dried completely. Fully dried nettle is stingless and brittle. The risk is in partially dried leaves — dry them fully, and store only leaves that pass the crumble test.
Can you freeze stinging nettles without blanching? You can freeze them raw (the freeze kills the sting and makes de-stemming easy), but quality is better if you blanch first, squeeze dry, then freeze. Either way, always cook thawed nettles before eating.
What neutralizes nettle stings on skin? Time, mostly — the burn fades in a few hours. Cool water, a cold compress, or a doc-leaf poultice (dock usually grows near nettles) takes the edge off. Washing helps only if done soon after the sting.
Bring It All Together
The whole skill fits in five lines now:
- Identify in the field — opposite leaves, serrated, stings on a gloved touch.
- Harvest the top 4–6 inches with gloves and scissors, skip flowering plants and roadside patches.
- Wash with gloves on, then blanch 2–3 minutes in a rolling boil.
- Handle everything barehanded from that point on — soup, pesto, greens, chips.
- Store extras blanched and frozen, or bone-dry for tea.
That’s it. The plant that guards itself with glass needles becomes one of the most generous, most nutritious, most forgiving greens you can cook — and it costs nothing but ten minutes in gloves. The sting that scares people off is the same sting that keeps the harvest honest: if you respect it enough to learn the process, you end up with food most people walk past every day.
Once your kitchen confidence is built, the field is the next frontier — telling true nettle from its cousins mid-hike, spotting a fresh patch before it flowers, knowing what else on the trail is food and what’s a lookalike with a bad personality. That’s exactly why I keep an identification tool in my pocket. Edible Plant Identifier works straight from a photo — point your camera at a plant and get an ID with edible/not-edible notes and lookalike warnings, and it runs fully offline, because good nettle patches rarely come with cell signal. It doesn’t replace the five-second touch test or common sense, but it catches you on the days when memory gets fuzzy and the patch looks different than it did last spring.