I’ve been foraging for over 15 years now, and I still remember the moment I realized that knowing what to pick is only about 30% of the battle.
I was in my second year of serious foraging, standing in a patch of lamb’s quarters so abundant it looked like someone planted a crop. I filled three grocery bags. Proud of my haul, I drove home, dumped them on the kitchen counter—and watched half of them wilt into a slimy mess within 24 hours because I hadn’t thought about how to store them.
That was the day I learned that foraging is a system. It’s not just identification. It’s preparation, timing, gear, technique, ethics, preservation, and safety all working together. A botanist who can name every plant in a meadow is not necessarily a good forager. A good forager knows when to go, what to bring, how much to take, how to clean it, how to keep it, and when to leave a patch alone entirely.
This article is the distillation of every practical tip I wish someone had handed me on day one. Think of it as the operating manual that connects all the plant-specific knowledge you’ll build over time. If our Foraging for Beginners guide is your driver’s license, this is your mechanic’s handbook.
1. The Forager’s Planning Checklist — Know Before You Go
The difference between a successful forage and a frustrating walk in the woods almost always comes down to what happens before you leave the house. I learned this the hard way after driving 45 minutes to a spot I’d scouted on Google Maps, only to discover the entire area had been sprayed with herbicide two days earlier. The plants were there—brown, curling, and completely inedible.
Here’s the checklist I now run through every single time:
Research the Land and Get Permission
Never assume land is public. In the United States, foraging rules vary dramatically by land type:
| Land Type | Typical Rules |
|---|---|
| National Forests | Usually permit personal-use foraging; check local ranger district for quantity limits |
| National Parks | Almost universally prohibited — don’t even think about it |
| State Parks | Varies wildly by state; some allow, some don’t, some require permits |
| BLM Land | Generally permissive for personal use |
| Private Land | Always get written or verbal permission from the landowner |
| Roadside / Right-of-Way | Technically public but high contamination risk from vehicle exhaust and spraying |
Practical tip: I keep a notes app entry with the name of every landowner who’s given me permission, when they gave it, and any conditions they mentioned. “Don’t park in the driveway,” “close the gate behind you,” “let me know when you’re coming” — write it all down. Respecting these small requests is what keeps foraging doors open.
Check Local Regulations
Some plants have specific harvest seasons, permit requirements, or quantity limits. Ginseng, for example, is heavily regulated. Ramps (wild leeks) have harvest limits in many states. Even common plants like elderberry might have transport restrictions across state lines if you’re dealing with cuttings or seeds.
Quick rule of thumb: If you’re foraging anything that isn’t an abundant invasive or a common weed, spend five minutes on your state’s Department of Natural Resources website before you go. It’s boring, it’s bureaucratic, and it might save you from a fine.
Weather and Seasonal Timing
Plants don’t follow calendar dates — they follow temperature, rainfall, and day length. A “May plant” in Vermont might peak in April in Virginia and June in northern Minnesota.
I use a combination of:
- The Farmer’s Almanac frost date calculator for my specific zip code
- Local foraging Facebook groups (search your state + “foraging”)
- iNaturalist observations filtered by species and date range in my area
The single biggest seasonal mistake beginners make: going out at the wrong time of day. Early morning — within two hours of sunrise — is almost always the best window. Plants are hydrated, temperatures are cool, and the light is good for identification. Midday summer foraging is miserable and the greens you collect will wilt before you get to the car.
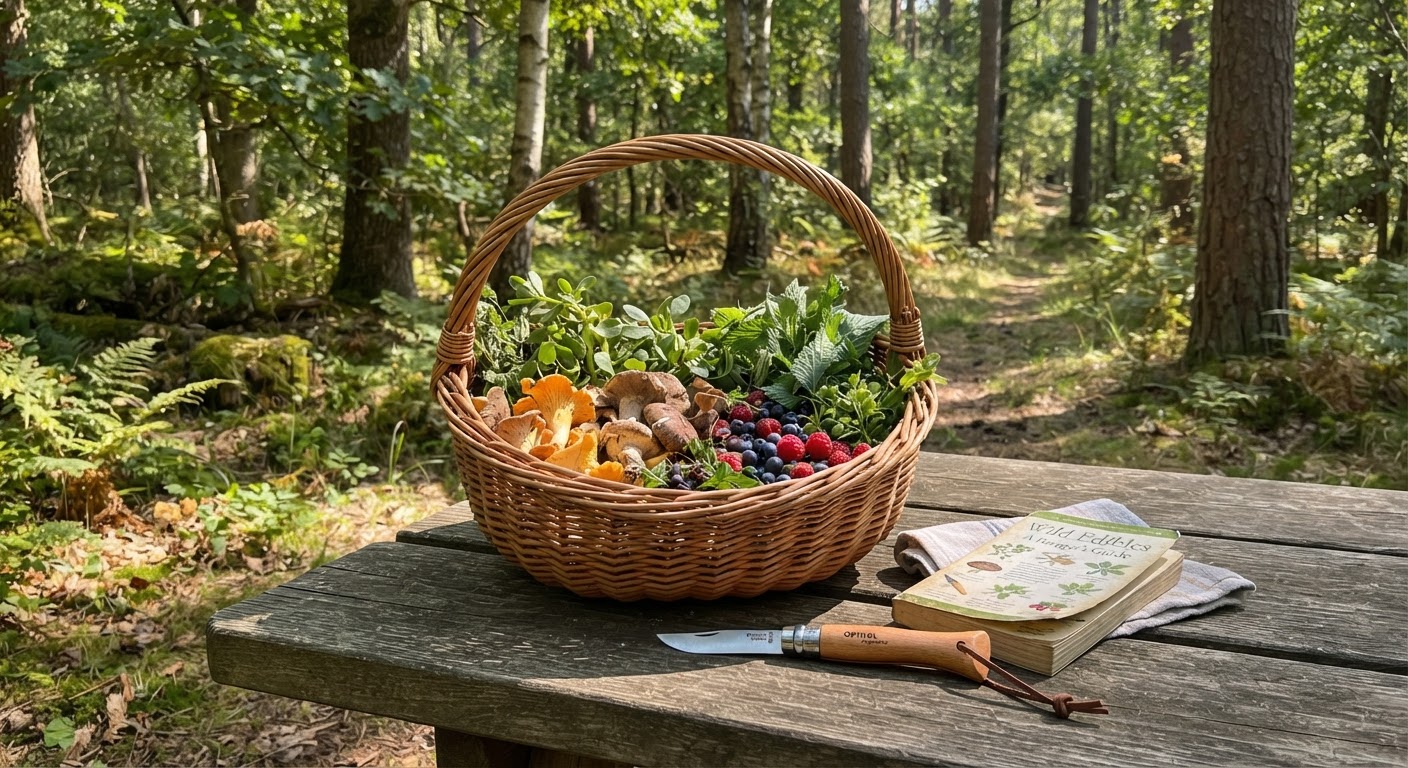
2. The Essential Foraging Gear Kit — What I Actually Carry
Foraging gear doesn’t need to be expensive or complicated. You don’t need a $400 backpack and titanium tools. You need a few reliable items that work every time.
The Non-Negotiables
| Item | Why You Need It | What to Look For |
|---|---|---|
| Foraging knife | Clean cuts for stems, mushrooms, and roots | Hori hori knife (serrated edge + digging blade) or a good folding knife like Opinel No. 8 |
| Collection bags | Separating species prevents cross-contamination | Paper bags (breathable), mesh produce bags, or cloth sacks — not plastic, which traps moisture and accelerates spoilage |
| Field guide | Positive plant ID is non-negotiable | Region-specific guides beat national ones. I use Samuel Thayer’s books for North America and Roger Phillips for mushrooms |
| Gloves | Protection from thorns, nettles, and irritants | Lightweight leather or rubber-coated garden gloves |
| Water | Hydration and field cleaning | At least 1 liter per 2 hours of summer foraging |
| Phone (charged) | GPS, camera for ID confirmation, emergency calls | Download offline maps for your foraging area beforehand |
Nice-to-Have Upgrades
- Basket: A real foraging basket (not just for aesthetics — the open design prevents greens from getting crushed and allows airflow)
- Small pruning shears: Faster than a knife for woody stems like elderberry clusters
- Hand lens / loupe: 10x magnification for examining tiny plant features
- Tick key or tweezers: If you forage anywhere with ticks (which is most places), carry one
- Small first-aid kit: Bandages, antiseptic wipes, antihistamine for unexpected plant reactions
- GPS unit: Phone batteries die; a cheap GPS unit doesn’t
What I Actually Carry
After years of overpacking, here’s my real-world kit that fits in a small canvas shoulder bag:
Hori hori knife, three cloth produce bags, one larger canvas sack, leather gloves, a regional field guide, a water bottle, my phone with offline maps, and a granola bar. That’s it. I’ve done hundreds of forages with exactly this setup.
The granola bar is not a joke. Nothing makes you more likely to throw caution to the wind and nibble something questionable than being hungry. Eat before you forage or bring a snack.
3. Seasonal Foraging — What to Look For, Month by Month
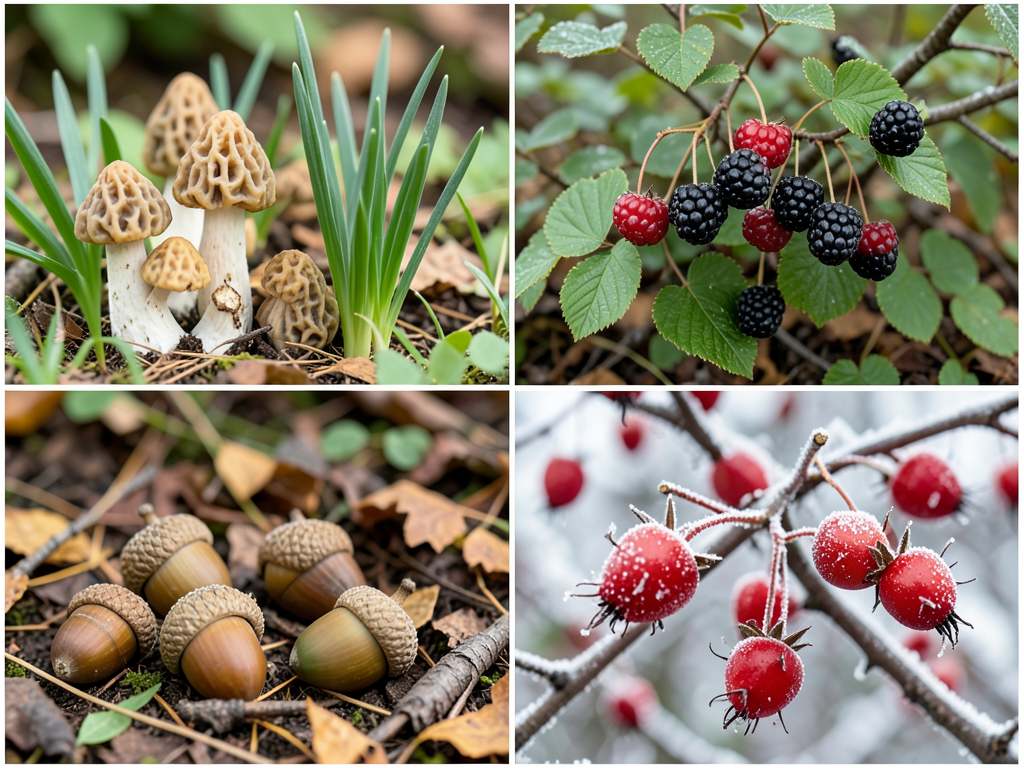
Foraging follows a rhythm. Once you internalize the seasonal patterns, you’ll start anticipating each harvest window like an old friend coming to visit. Here’s how the year typically breaks down for temperate North America — adjust by a few weeks depending on your latitude.
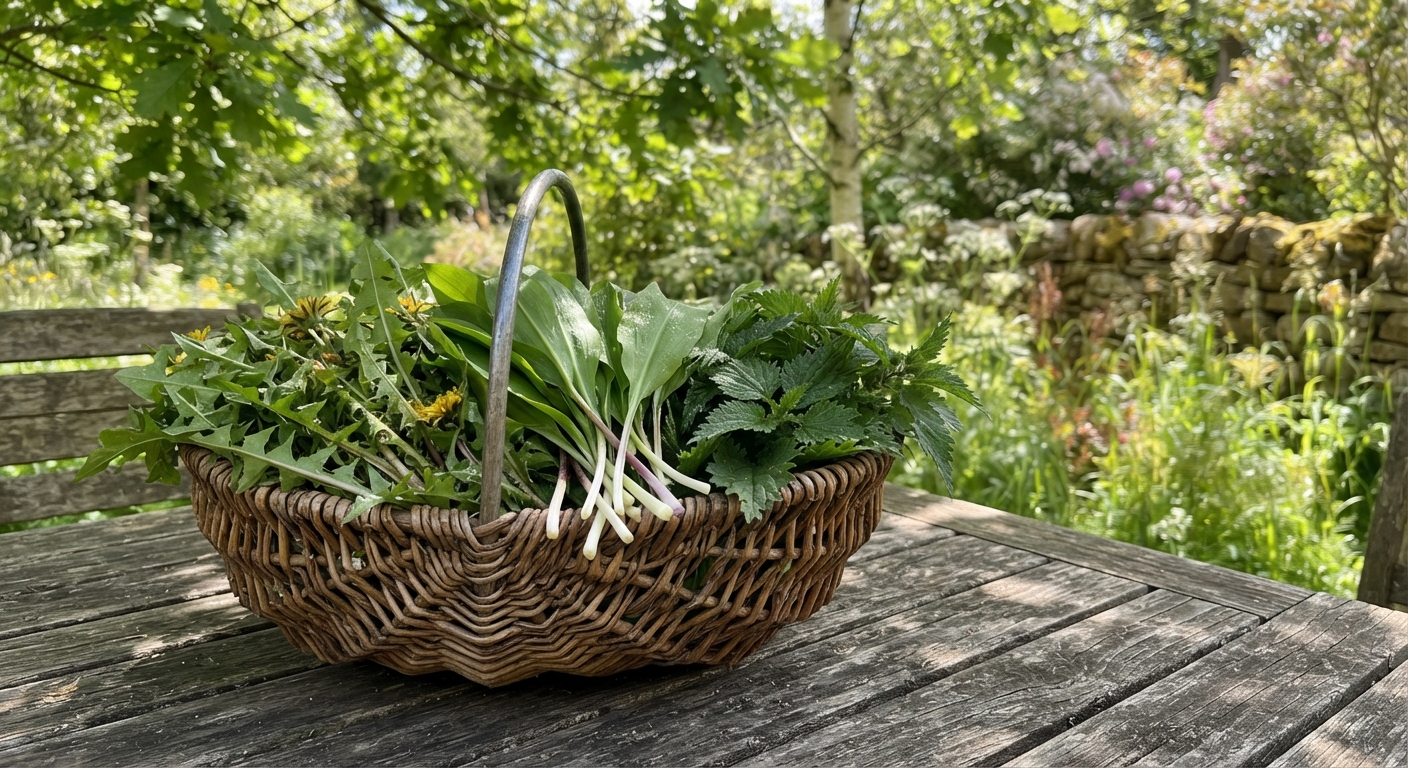
Spring (March – May)
Spring is the forager’s Super Bowl. This is when the greatest diversity of tender, nutrient-dense greens emerges.
What’s available:
- Wild greens: dandelion, chickweed, nettles, garlic mustard, lamb’s quarters, purslane
- Alliums: ramps, wild garlic, wild onion, field garlic
- Mushrooms: morels (the holy grail), dryad’s saddle, oyster mushrooms
- Flowers: violet, redbud, dandelion blossoms, elderflower (late spring)
Key tip: Spring greens are at their peak when they’re young — before flowering. Once a plant bolts (sends up a flower stalk), the leaves turn bitter. Harvest dandelion and chickweed leaves when they’re low to the ground and tender.
Summer (June – August)
Summer is berry season, and the greens shift toward fruits, seeds, and heat-loving plants.
What’s available:
- Berries: blackberries, raspberries, mulberries, blueberries, serviceberries, wineberries
- Fruits: wild plum, pawpaw (late summer), mayapple (ripe only, the unripe fruit is toxic)
- Greens: purslane thrives in heat, amaranth leaves, lamb’s quarters (still going)
- Mushrooms: chanterelles, chicken of the woods, lobster mushrooms
Key tip: Summer foraging is an early-morning game. Berries picked in the heat of the day are soft and spoil faster. Get out at dawn, pick into breathable containers, and process within hours.
Fall (September – November)
Fall is nut season, plus a second wave of mushrooms and the tail end of late fruits.
What’s available:
- Nuts: black walnuts, hickory nuts, acorns (leached), chestnuts, beechnuts
- Fruits: persimmons (after first frost), late pawpaws, wild grapes, rose hips
- Mushrooms: hen of the woods (maitake), puffballs, honey mushrooms, late oyster mushrooms
- Roots: burdock, dandelion root, sunchokes (Jerusalem artichokes)
Key tip: Acorns are the most underutilized wild food in North America. Yes, they require leaching to remove tannins, but once processed, acorn flour is nutty, nutritious, and free. One mature oak can produce hundreds of pounds of acorns in a mast year.
Winter (December – February)
Winter foraging is all about survival foods, tree products, and the few hardy species that persist.
What’s available:
- Tree products: pine needles (for tea), birch bark (tapping), maple sap (late winter)
- Roots: burdock, dandelion root, cattail rhizomes (in unfrozen water)
- Greens: chickweed (in mild climates), wintercress, watercress (in unfrozen springs)
- Shelf fungi: turkey tail (medicinal), chaga (on birch trees)
Key tip: Winter is the easiest season to identify trees by bark and silhouette, and the hardest season to misidentify anything — there’s simply less to confuse. Use winter walks to map out your spring and summer spots.
4. The Golden Rules of Ethical Harvesting
Ethical foraging isn’t about rules for the sake of rules. It’s about making sure the plants you love are still there next year — and the year after that, and the year after that. I’ve watched popular foraging spots get stripped bare by overzealous newcomers. It’s heartbreaking, and it’s completely avoidable.
The 1-in-20 Rule
The most commonly cited guideline: take no more than 1 in 20 plants from any given patch (5%). If you’re harvesting greens where you only take a few leaves per plant, you can aim for 1 in 10 at most.
But here’s what most guides don’t tell you: the 1-in-20 rule is a minimum standard, not a target. If a patch has 20 ramps and you take one, that’s within the rule — but if there are only 20 ramps total in the area, you just took 5% of the entire local population. Scale matters. Always assess whether the species is abundant locally, not just within the patch in front of you.
The Invasive Exception
There’s one beautiful exception: invasive species. Garlic mustard, Japanese knotweed, autumn olive, kudzu — these plants are actively damaging native ecosystems, and you can harvest them with zero guilt. In fact, please do. Eat the invasives.
That said, even with invasives:
- Still check for pesticide exposure
- Don’t spread seeds by careless handling
- Clean your boots and tools between sites to avoid transporting seeds
Leave No Trace, Forager Edition
| Principle | What It Means |
|---|---|
| Pack it in, pack it out | Trash, snack wrappers, everything |
| Don’t widen trails | Stay on existing paths between harvest spots |
| Minimize root disturbance | Don’t dig up entire root systems unless you’re harvesting roots specifically — and even then, dig carefully and fill holes |
| Don’t broadcast locations publicly | Posting GPS coordinates of your best morel spot online is a fast way to lose it forever. Share knowledge, not locations |
| Leave some for wildlife | Those berries feed birds, bears, and other animals. You’re a guest in their pantry |
Rotating Your Harvest Spots
I keep a simple rotation: I never hit the same patch two years in a row for slow-reproducing plants. Mushroom spots, for example, I’ll visit annually since the mycelium underground is unaffected by picking the fruiting bodies above ground. But for ramps, which can take 7 years to reach maturity from seed, I harvest from any given patch at most once every three years — and I never take more than a handful.
5. Safety Protocols That Could Save Your Life
I’m going to be blunt here because this section matters more than any other. Foraging is overwhelmingly safe when you follow protocols. It’s dangerous when you get casual. Every experienced forager I know has at least one “close call” story — mine involves confusing young pokeweed shoots with something else. I caught it before eating. Most people do. But not everyone.
Rule #1: Never Eat What You Can’t Positively Identify
This sounds obvious. It isn’t, because “positively identify” has a specific meaning in foraging.
A positive ID requires cross-referencing at least three distinct features, not just one. If you think you’ve found wild carrot (Queen Anne’s lace), you must also confirm it’s NOT poison hemlock by checking:
- The stem — wild carrot has hairy stems; poison hemlock stems are smooth with purple blotches
- The smell — crush a leaf: wild carrot smells like carrots; poison hemlock smells unpleasant and musty
- The bracts under the flower — wild carrot has distinctive three-forked bracts curling under the umbel
One feature match is not enough. Three is the minimum.
For a deeper dive on this topic, head over to our How to Identify Edible Plants guide — it walks through the full identification framework step by step.
The Universal Edibility Test
This is a survival protocol, not a casual foraging technique. It’s designed for situations where you’re lost and must find food. In everyday foraging, you should never need it because you should only eat plants you can positively identify.
But it’s worth knowing:
- Separate the plant into parts (leaves, stems, roots, flowers)
- Test one part at a time, on an empty stomach
- Rub a small piece on your inner wrist; wait 15 minutes for any reaction
- Touch a small piece to your outer lip; wait 3 minutes
- Place a tiny piece on your tongue; wait 15 minutes
- Chew a small piece without swallowing; wait 15 minutes
- Swallow a tiny amount; wait 8 hours
- If no adverse reaction, the plant part is likely safe
This test takes over 9 hours per plant part. It’s not practical for everyday foraging. It’s a last resort. Use the field guide instead.
Pesticides, Pollution, and Location Safety
Where you forage matters as much as what you forage:
| Hazard | Safe Distance | Why |
|---|---|---|
| Roads / highways | 50+ feet (further for busy roads) | Heavy metals from exhaust and brake dust accumulate in soil and plants |
| Agricultural fields | 100+ feet or confirm organic | Pesticide drift is real and often invisible |
| Railroad tracks | Avoid entirely | Railroads historically used herbicides heavily; soil contamination persists for decades |
| Industrial sites | Avoid entirely | Soil contamination risk from decades of industrial use |
| Golf courses and manicured parks | Avoid unless confirmed chemical-free | Heavy pesticide and herbicide use |
| Dog walking areas | Wash thoroughly | The obvious reason |
Quick field rule: If the plants look too perfect — no insect damage, no spots, unnatural uniformity — someone is probably spraying. Wild plants naturally show signs of insect life. A pristine patch in an urban area is a red flag.
Also, be sure to review our Poisonous Lookalikes Guide before heading out. It covers the most dangerous plant pairs that trip up beginners every single season.
6. Harvesting Techniques That Actually Work
How you harvest determines whether the plant survives, how long your haul stays fresh, and how much processing work awaits you at home.
When and How to Cut
Greens (dandelion, chickweed, lamb’s quarters, nettles): Harvest individual leaves from the outside of the rosette, leaving the inner leaves to continue growing. Never pull the entire plant unless you’re deliberately thinning a patch or harvesting the root. Use scissors for large quantities — it’s faster and cleaner than pinching.
Mushrooms: Cut at the base with a knife rather than pulling. This keeps the mycelium intact and keeps your mushrooms cleaner. Place mushrooms in a separate paper bag or basket compartment — they’ll pick up flavors and moisture from greens.
Berries: Pick into shallow containers. Deep containers crush berries on the bottom under the weight of berries on top. A wide, flat basket or a container no deeper than 4 inches is ideal. Pick only fully ripe berries — they don’t ripen after picking.
Roots (burdock, dandelion root, sunchokes): Dig after rain when soil is soft. Use a hori hori or a digging fork, not a shovel — you want precision. Start digging 6 inches away from the plant and work inward so you don’t slice through the root. Fill your holes. Always.
The One-Hand Rule
For abundant greens, I use what I call the “one-hand rule”: don’t pick more than you can hold in one hand at a time. Put it in the bag, assess what’s left, then decide if you need more. This prevents the common “oops, I picked five pounds of nettles and now I don’t know what to do with them” problem. Foraging should match what you’ll actually eat, preserve, or share.
Field Processing
Do as much cleaning in the field as possible. Knock dirt off roots. Remove damaged leaves. Cut stems to length. The less dirt and debris you bring home, the less work later. I carry a small brush (an old paintbrush works perfectly) for quickly cleaning mushrooms in the field.
7. Preserving Your Wild Harvest — Don’t Let It Go to Waste
The tragedy of a great forage is watching it rot in the fridge because you didn’t have a preservation plan. Here’s how to handle the most common scenarios:
Drying and Dehydrating
Best for: Mushrooms, herbs, flowers, greens (for tea)
| Method | Best For | Time | Notes |
|---|---|---|---|
| Air drying | Herbs, sturdy mushrooms | 3-7 days | Hang in bundles in a dry, well-ventilated area away from direct sun |
| Dehydrator | All mushrooms, berries | 4-12 hours at 125-135°F | Most consistent results; worth the investment |
| Oven (lowest setting) | Mushrooms, greens | 2-6 hours | Crack the door open for airflow; monitor closely |
| Sun drying | Tomatoes, fruit leather | 1-3 days | Only in hot, dry climates; cover with cheesecloth |
Key tip: Mushrooms need to be completely dry — they should snap like a cracker, not bend. Any residual moisture will cause mold. Store in glass jars with a silica gel packet for long-term stability.
Freezing
Best for: Berries, blanched greens, pestos
- Berries: Spread on a baking sheet in a single layer, freeze solid, then transfer to freezer bags. This prevents the dreaded berry-brick.
- Greens (nettles, lamb’s quarters, dandelion): Blanch for 30-60 seconds in boiling water, shock in ice water, squeeze out excess moisture, and freeze in portion-sized balls or pucks. Nettles lose their sting when blanched or dried.
- Pesto: Blend wild greens (garlic mustard makes an incredible pesto) with olive oil, nuts, and garlic, then freeze in ice cube trays. Pop out individual portions as needed.
Pickling and Fermenting
Best for: Ramps, wild garlic, mushrooms, burdock root, purslane stems
Lacto-fermentation is ridiculously simple: submerge clean plant material in a 2-3% salt brine (20-30g salt per liter of water), weight it down so everything stays below the brine surface, and wait 5-14 days at room temperature. The result is probiotic, tangy, and shelf-stable in the fridge for months.
My go-to ramp pickle: Clean ramp bulbs, pack into a jar with a few peppercorns and a bay leaf, cover with 3% brine, ferment 7 days. They’ll keep for 6 months refrigerated and taste like garlicky, funky magic on everything.
Infused Oils, Vinegars, and Tinctures
- Herb-infused vinegar: Fill a jar with clean herbs (dandelion, chickweed, wild garlic), cover with apple cider vinegar, steep 2-4 weeks, strain. Use for salad dressings.
- Berry shrub: Macerate wild berries in sugar overnight, add vinegar, steep 1 week, strain. Mix with sparkling water for a tangy, probiotic drink.
- Mushroom powder: Grind completely dried mushrooms in a coffee grinder dedicated to non-coffee use. Add to soups, stews, and rubs for deep umami.
8. Building Your Forager’s Routine
Foraging becomes exponentially easier when you treat it as a practice rather than a series of one-off adventures.
How Often Should You Forage?
I recommend newcomers aim for one focused forage per week during the growing season. This gives you enough repetition to build pattern recognition without overwhelming you. Each session, focus on identifying and harvesting two to three species maximum. Any more than that and you risk shallow learning — recognizing a plant well enough to pass a quiz but not well enough to eat it confidently.
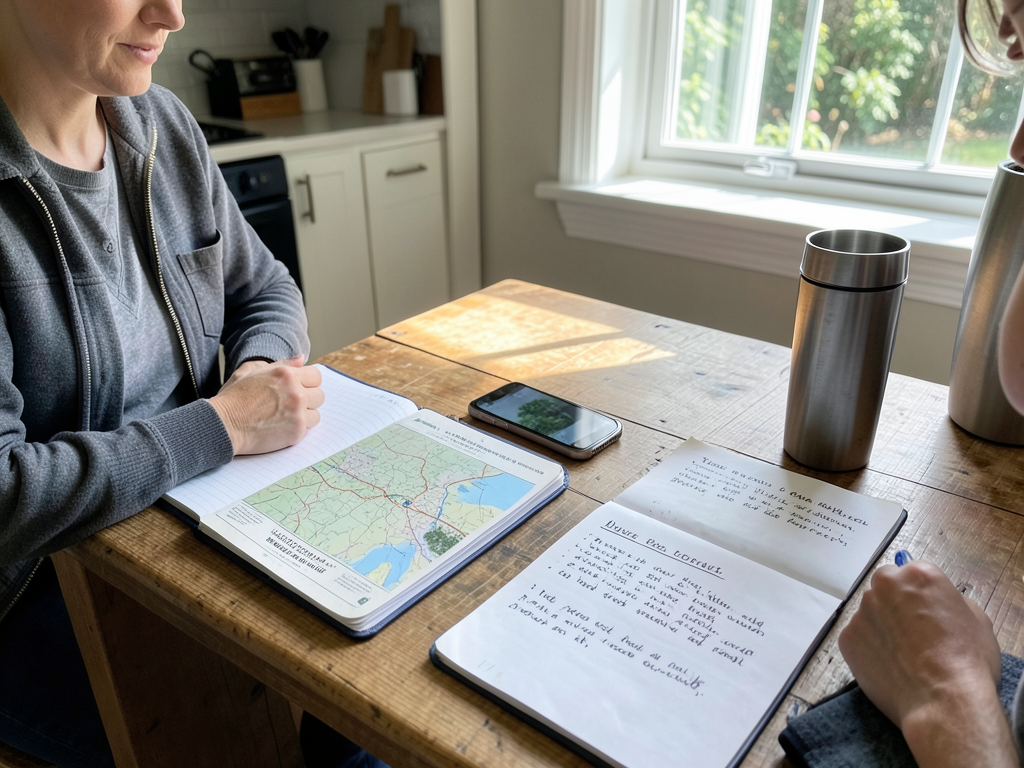
Keeping a Foraging Journal
This is the single habit that accelerated my foraging more than anything else. My journal entries are simple:
- Date and weather conditions
- Location (I use GPS coordinates, not just “that oak tree near the creek”)
- Species observed (even ones I didn’t harvest — phenology data is gold)
- What was at peak and what wasn’t quite ready yet
- A rough sketch or phone photo reference
After one full year of journaling, you’ll have an incredibly accurate picture of what grows where and when in your specific area. After three years, you’ll be able to predict harvest windows within a few days. No app can give you that — it’s hyper-local knowledge that only comes from paying attention.
Pro tip: I tag each journal entry with the species so I can flip through all my dandelion entries at once and see exactly when they were at their best across multiple years.
9. Common Beginner Mistakes (And How to Skip Them)
I’ve made most of these. I’ve watched others make all of them. Here’s your shortcut:
| Mistake | Why It Happens | The Fix |
|---|---|---|
| Overconfidence after first success | You positively ID’d dandelions and now you feel invincible | Every new species resets your confidence to zero. Approach each one as if you’ve never foraged before |
| Picking everything you see | Excitement takes over and you fill every container | The one-hand rule. Don’t harvest more than you can eat or preserve in 2 days |
| Using plastic bags | They’re convenient and you had them in the car | Paper bags or cloth sacks only. Plastic steams your harvest into mush |
| Foraging near roads | It’s convenient and the plants look great | The 50-foot minimum isn’t negotiable. Roadside plants absorb heavy metals |
| Tasting to identify | “It looks right, let me just…” | Never taste-test an unknown plant. Some toxins work in tiny doses |
| Not telling anyone where you’re going | Solo foraging feels peaceful and you didn’t think about it | Send a pin to someone. If you twist an ankle in a ravine, someone needs to know where to look |
| Skipping the spore print for mushrooms | It seems unnecessary when the mushroom looks “obvious” | Deadly galerina looks almost exactly like some edible species. Take the 2 hours to do a spore print on paper |
| Harvesting rare plants | You didn’t know it was rare | Before targeting a new species, check its conservation status. Ginseng, goldenseal, and ramps are under pressure in many areas |
10. Frequently Asked Questions
Q: Is foraging legal?
A: It depends entirely on where you are. Most National Forests allow personal-use foraging without a permit (check local limits). State parks vary dramatically — some allow it, many don’t. National Parks almost universally prohibit removing any plant material. Private land requires permission. Always check before you harvest. A quick call to the local ranger station can save you from a citation.
Q: What’s the easiest plant for a total beginner to start with?
A: Dandelion. It’s globally distributed, nearly impossible to misidentify (especially if you aren’t confusing it with chicory or cat’s ear), and every part is edible — leaves, flowers, and roots. The leaves are bitter but excellent in salads and cooked dishes. Once you’re confident with dandelion, chickweed and lamb’s quarters are natural next steps. Our Common Edible Weeds Guide covers all three in detail.
Q: How do I clean wild plants properly?
A: Triple-rinse method. Fill a large bowl or sink with cold water. Submerge your harvest and agitate gently. Let it sit for 2 minutes — dirt sinks, leaves float. Lift the greens out (don’t pour through a colander, which dumps the dirt back on top). Repeat two more times. For gritty greens like lamb’s quarters, add a splash of white vinegar to the first rinse to help dislodge dirt. A salad spinner is your best friend for drying.
Q: Can I forage in winter?
A: Yes, but it requires a different skillset. Winter foraging focuses on tree products (pine needles, birch bark), persistent berries (rose hips, sumac), roots (burdock, dandelion), and hardy greens near unfrozen water sources. It’s also the best season for scouting — identifying trees by bark and mapping out spots for spring.
Q: What’s the best field guide for North America?
A: I recommend books by Samuel Thayer — The Forager’s Harvest, Nature’s Garden, and Incredible Wild Edibles. They’re region-specific (Upper Midwest / Eastern US bias), extremely detailed, and written by someone with decades of hands-on experience. Pair a Thayer book with a region-specific wildflower guide and a dedicated mushroom guide (I use Mushrooms Demystified by David Arora). One field guide is never enough.
Q: How do I know if a plant has been sprayed with pesticides?
A: Look for the warning signs: perfectly uniform plants with zero insect damage, unnatural color (too dark green or bluish-green), a chemical smell, or dead vegetation around the base of otherwise healthy plants. If you’re foraging anywhere near agricultural land, residential lawns, or golf courses, assume it’s been sprayed and find another spot. Your Wild Edible Berries Guide has additional safety tips specific to fruit harvesting.
Q: What if I accidentally eat something poisonous?
A: Stay calm. Note exactly what you ate and how much. Call Poison Control immediately: 1-800-222-1222 (US). Do not induce vomiting unless Poison Control specifically instructs you to do so — some toxins cause more damage coming back up. If symptoms are severe (difficulty breathing, seizures, loss of consciousness), call 911. Save a sample of the plant for identification.
Final Thoughts: Foraging Is a Practice, Not a Destination
I started foraging because I wanted free food. I keep foraging because it fundamentally changed how I experience the natural world. Walking through a forest stops being a hike and becomes a conversation. You learn to read the landscape — the south-facing slope that warms first in spring, the creek bank where watercress holds on through mild winters, the old apple tree on an abandoned homestead that still fruits every September.
There’s no finish line. You don’t “complete” foraging. Every walk teaches you something new. Some days you come home with dinner. Some days you come home with a notebook full of observations and muddy boots. Both are wins.
The tips in this article are the scaffolding. Use them until they become second nature, then let them fade into the background while you focus on what really matters: building your own relationship with the land, one season at a time.
Now get outside. And bring the granola bar.
Related Guides: